Are you looking to set up Google Tag Manager (GTM) on your website?
In this guide, we will show you how to install correctly and set up Google Tag Manager for your Flatsome Theme Powered Website.
Before we begin, let’s know more about GTM and its benefits. You are probably wondering what Google Tag Manager is if you are unfamiliar with the term. Let’s answer some most common questions about it.
What is Google Tag Manager?
Google Tag Manager is an excellent tool for your digital tracking needs. It allows you to deploy tags on your site without editing your code. This tool will enable you to deploy and update different code snippets called tags.
An excellent example of a tag is the Google Analytics tracking code you add to your website. So that you can track details of your traffic.
You can check this tutorial on how to add Google Analytics with WordPress to the Flatsome theme-powered website.
Not only Google Analytics, but there are also many other tracking services or tag vendors that require you to add a few lines of HTML or JavaScript code to your website to integrate their services. Such as Facebook Pixel, Adobe Analytics, LinkedIn Insight, and advertising tools like Google AdWords.
You can easily add and manage all these codes from a single interface and don’t need to edit the website’s code. There are built-in tag templates for popular services like Google Analytics, AdWords, DoubleClick, etc. However, you can also add custom tags to your website.
What are the benefits of Google Tag Manager?
You can do amazing things in Google Tag Manager once you get over the learning curve. A couple of main benefits include:
- All third-party code is in one place.
- It allows you to deploy tags quickly.
- Migrate all existing tags to GTM.
- Before you make anything live, you can see what’s working and what’s not.
- It offers you to deploy multiple tags and manage them from an intuitive interface.
Setting up Google Tag Manager
To set up Google Tag Manager, you can use two main methods. One is manual, and the other one is with WordPress analytics plugins. The stages are almost the same in each method.
Setup your Google Tag Manager Account
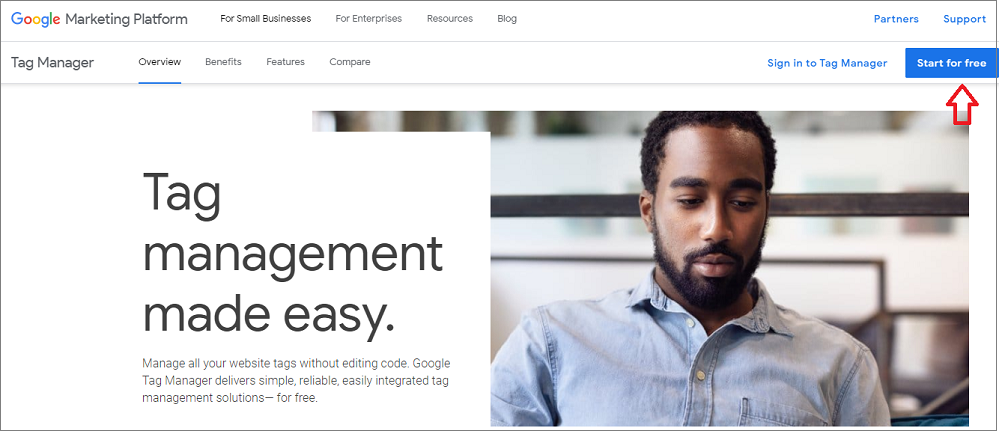
First, visit the Google Tag Manager website and sign up using the same Google account you used for Google Analytics.
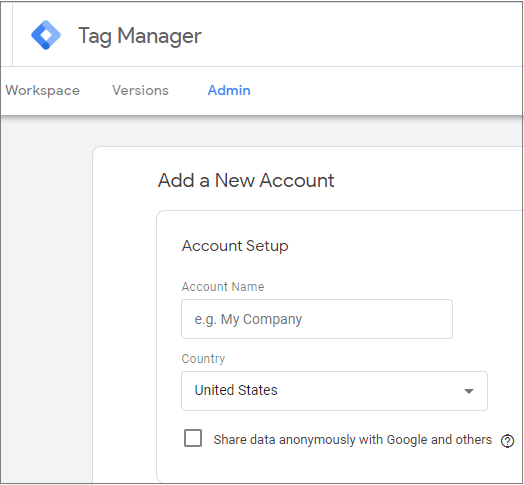
Next, you need to sign in with your Google account. You can notice the Google Tag Manager’s Create Account page once done. Simply click on the ‘Create Account button to get started.
Enter your account name and select your country from the drop-down. You can use your company name as your account name.
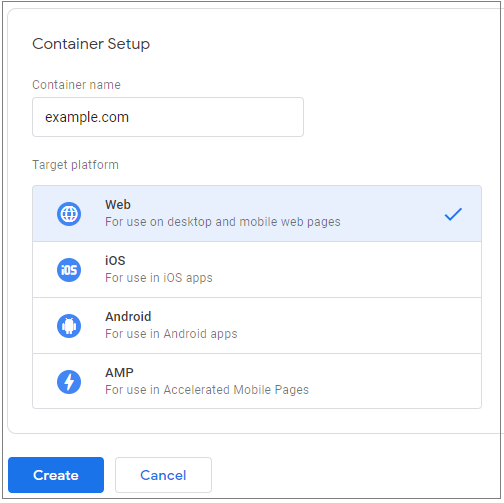
Next, you need to set up your container. It is the collection of tags, triggers, and all the configurations installed on a website.
You can use your website’s domain name for the container name. A container could be a website or an app on iOS or Android platforms. In this case, we will use the web. Click on the Create button to continue once you are done.
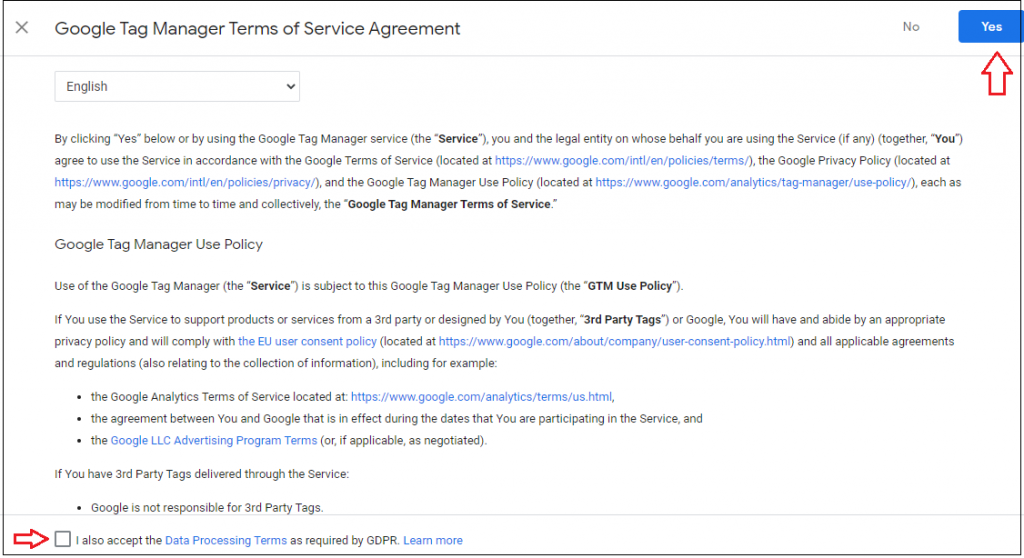
You will need to accept the Terms of Service Agreement of Google Tag Manager to proceed. Check the box to accept the Data Processing Terms, and then click the Yes button on the top right corner.
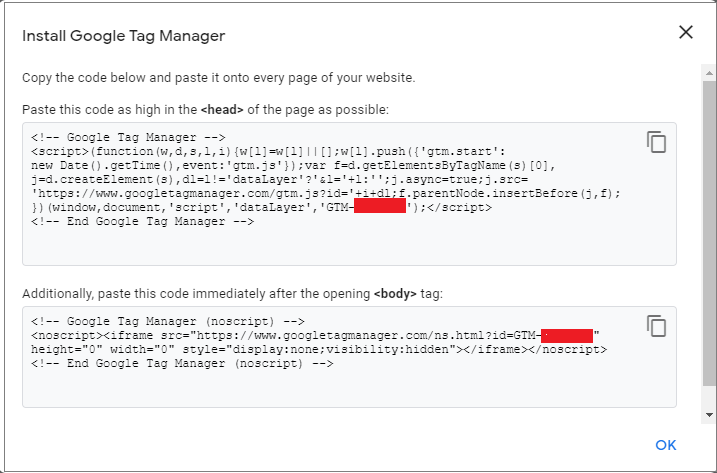
A new popup window appears on the screen upon accepting the terms of service with code snippets to install tag manager on your website.
There are two code snippets to be added. One is inside the <head> tag, and another is in your website’s <body> tag.
You will need these two codes to set up Google Tag Manager on your Flatsome theme-powered website. So keep the above tab open. It offers instructions on where to paste the code. But if you are an absolute beginner, it can be challenging.
Do not worry; we are going to show you the upcoming steps.
Add Google Tag Manager Code Manually
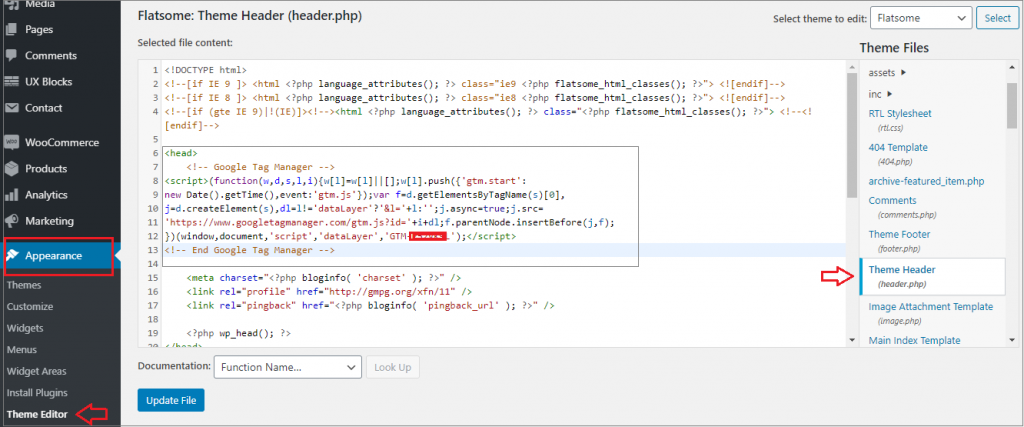
Head to your WordPress admin dashboard in a new tab. Then navigate to Theme Editor under the Appearance section.
Then click on the Theme Header from the right side to launch header.php within the theme editor.
As per GTM account instructions, copy the first code and paste it into the <head> element as shown in this image.
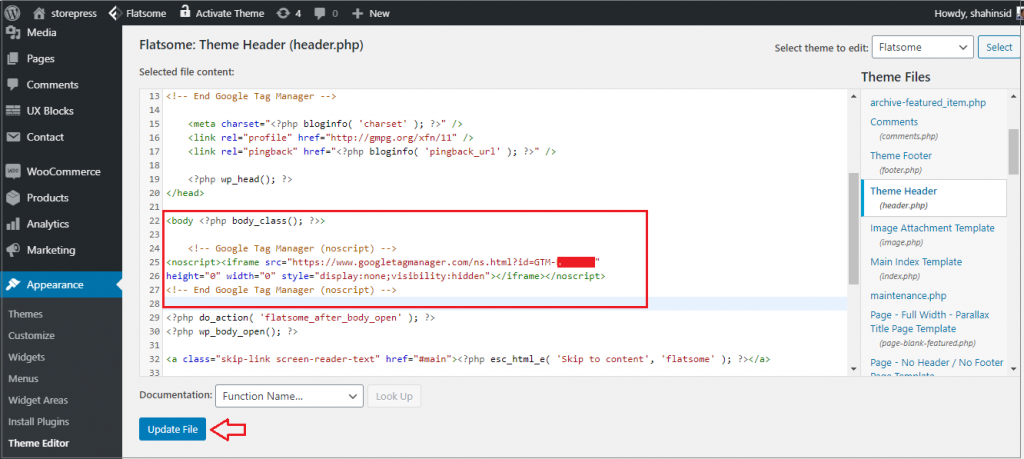
Then copy the second code and paste it immediately after the <body> tag as shown on the image.
Hit the Update File button at the bottom of the screen to save your settings once done.
There is another method to add GTM code to your Flatsome Powered website.
Add Google Tag Manager on the Flatsome Theme option
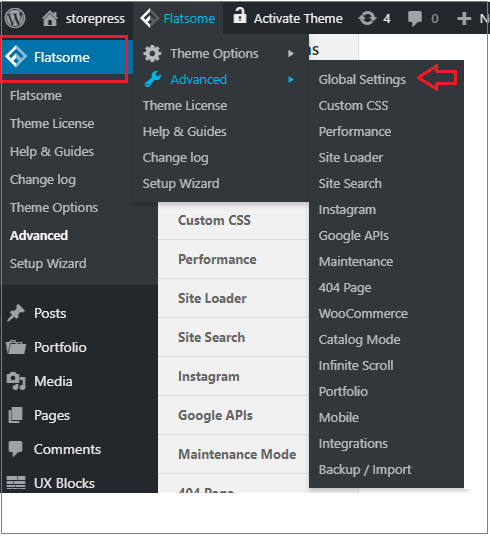
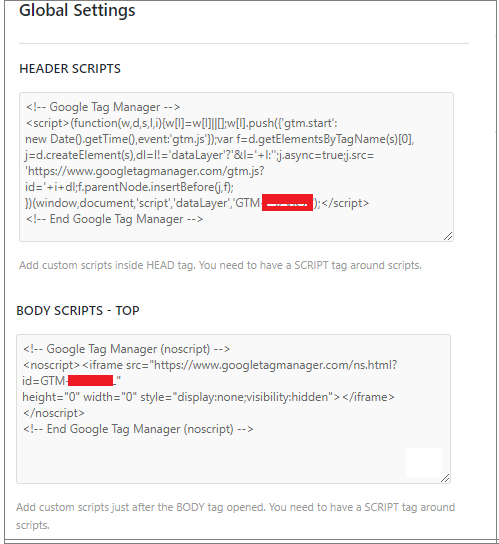
Head to your WP admin dashboard. Check for Advanced under Flatsome and click on Global Settings.
You’ll find both Header Scripts and Body Scripts to paste your analytics code.
Save All Changes by clicking on the button below on that page.
Note: we suggest you use a WordPress child theme if you go the manual route. Otherwise, your tracking code will be overwritten if you switch or update the theme.
Add Google Tag Manager using a Plugin
If other methods seem difficult for you, then add using a third-party plugin.
Let’s see how you can take the help of a plugin to insert the Meta tag exactly where it is needed.
Navigate to Add New under Plugins on your WP admin dashboard.
There are different plugins that you can use to add the GTM code. But here, I recommend Insert Headers and Footers plugin.
You can follow this guide to get help on how to install a WordPress plugin.
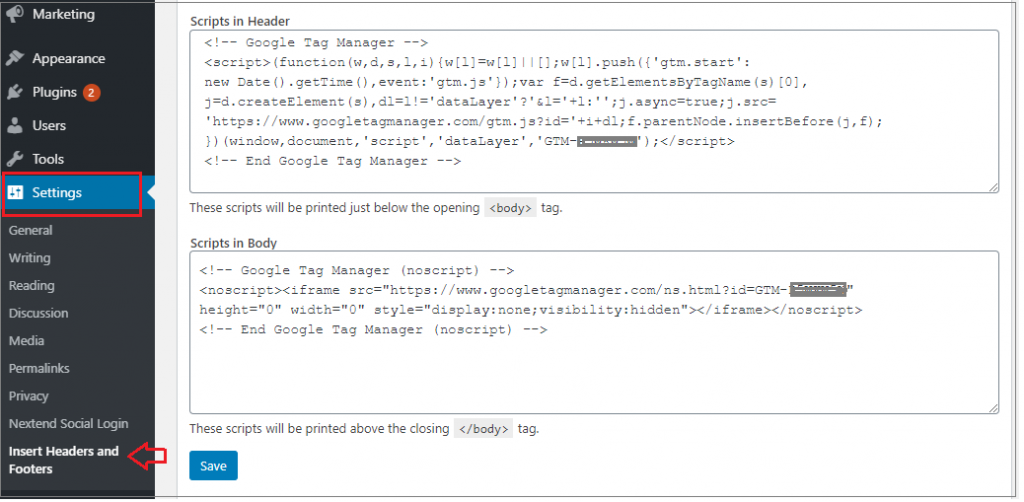
Once you install and activate the plugin, visit Insert Headers and Footers from Settings.
Then copy and paste the GTM code in the header section and click on the Save button to store the settings.
Add and Publish Tags in your Tag Manager
Once you have installed GTM on your website, you are ready to add code snippets (tag) provided by different tracking tools.
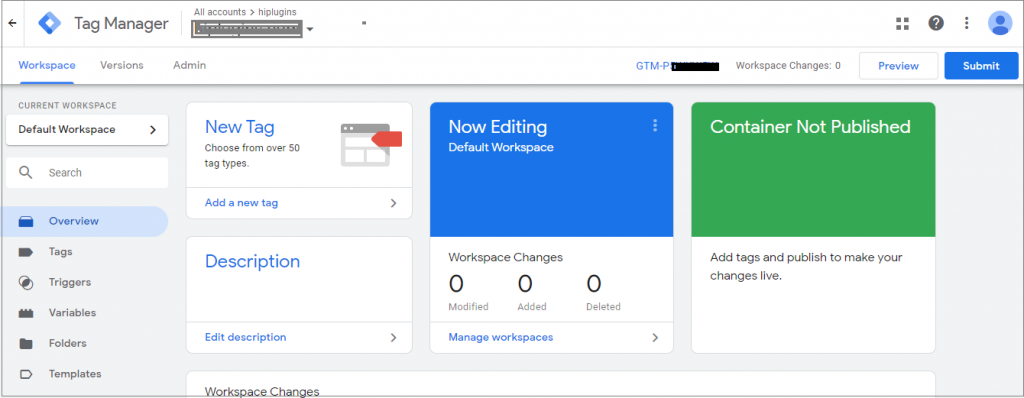
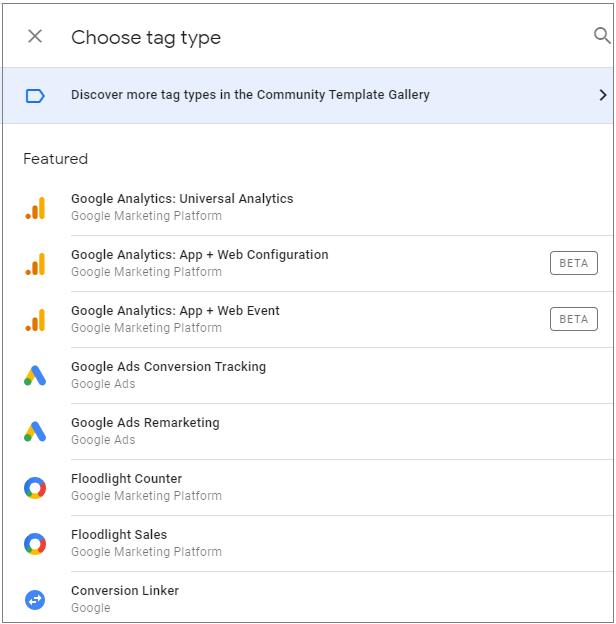
Now go back to the GTM dashboard, click the ‘New Tag’ button, and follow the steps to create your first tag. You can add different tags in your GTM container by following the same method and integrating your Flatsome-powered site with various tracking tools.
Google Tag Manager supports over 50 tag types. Tags in Google Tag Manager will not go live until you publish the container. So you will have to submit it from the GTM dashboard once you create your new tag.
Google Tag Manager is a powerful tool that helps put a lot of power in your hands to manage tags and collect actionable data. When you can set up the tool easily and quickly, you have more time to plan how to use all the data you can collect. It will help you with different kinds of SEO tips and tricks,
We hope this guide helped you to learn how to install and set up Google Tag Manager on your Flatsome Theme-powered website.


