In WordPress, the sidebar is not sticky by default. It’s tough to use the full power of the sidebar when it’s not sticky. To utilize it, you’ll need to make it sticky. The process of doing it is pretty simple. It takes a few steps to do that.
Adding a sticky sidebar in WordPress depends on the theme you’re using. If you’re using a theme in which the sticky sidebar feature is present by default, it’ll be easier to make it sticky. You need to follow the first method to do that. Don’t worry just try, if you don’t like it you can easily remove the sidebar from WordPress by following some steps.
You’ll need a different approach if your theme doesn’t have any default sticky sidebar section. Don’t worry, we’ve got your back. We’ve created another method of setting a sticky sidebar for this type of theme.
Benefits of Having A Sticky Sidebar
- User can go to any category no matter where he is on the website
- It can help visitors quickly access the relevant sections
- A sticky Sidebar can be a potential place for promoting products
- It’s a sweet spot for Google Ads
- Although there is many lead generation plugin for WordPress available, sticky sidebars bring leads to life by visual promotion.
Method 1
How to Set Sticky Sidebar in WordPress(Built-in Option)
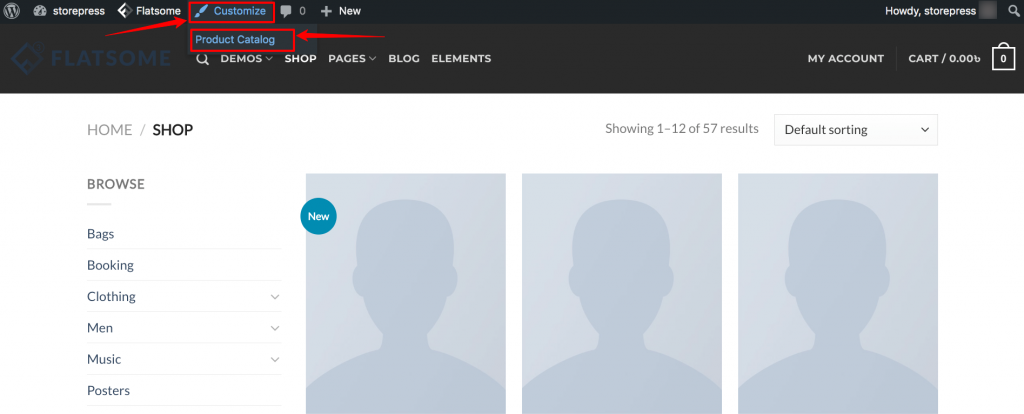
Step 1: Go to the page where you want to set a sticky sidebar, hover the cursor on Customize, and click on Product Catalog.
Step 2: You’ll find a new section on the left side. Scroll down, and you’ll see a section named Sticky Sidebar, tick that, then click the Publish button on the top to make the sidebar sticky.

Preview

Method 2
How to Set Sticky Sidebar in WordPress (With Plugin)
If your theme doesn’t have a prebuilt sticky sidebar in WordPress, you can easily create one. You’ll need only a plugin to do that.
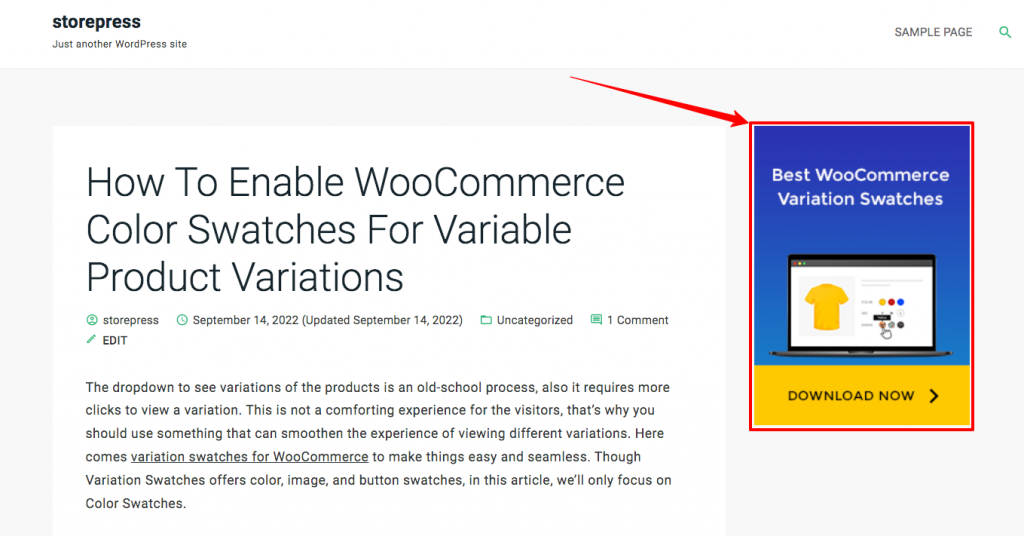
In our case, we’ll make this sidebar sticky for WooCommerce color swatches. This means it’ll stick to the screen no matter how many times visitors scroll.
Step 1: Go to the page you want to apply the sticky sidebar. Press command + option + C if you’re using macOS and press ctrl + shift + C if you’re using Windows. If you’re having an issue with this, click the right button on the mouse, then click Inspect.

After that, a developer’s tool will come up with the section. It can be on your web page’s right/ left/ top/ bottom. Click on the Element section, then click on the element selector. After that, click on the sidebar menu section of your website.
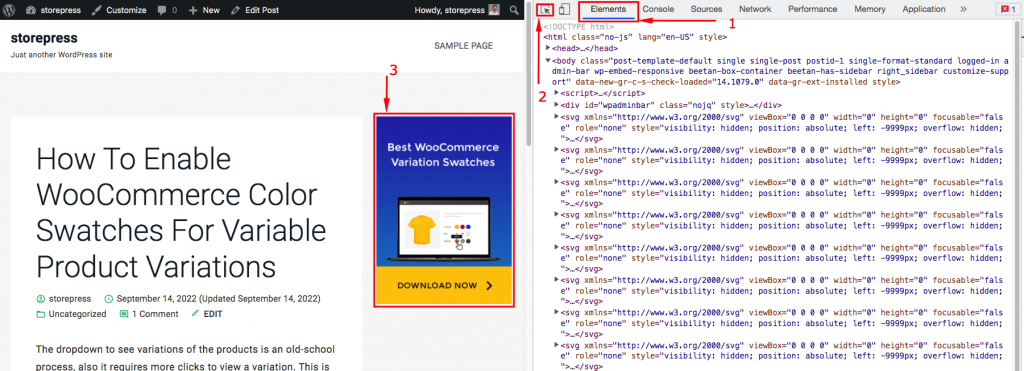
Step 2: Codes for that section will appear. You’ll find a wrapper in the sidebar. Copy the class/ id of that wrapper element.

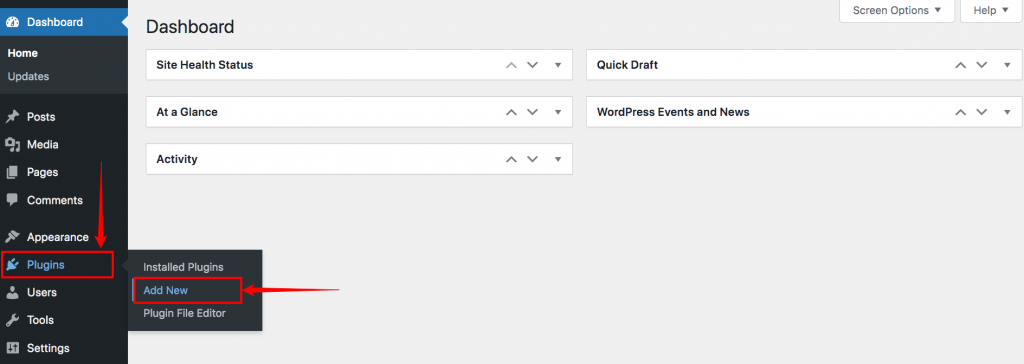
Step 3: After copying that, go to the Dashboard, hover the cursor on the Plugins, then click on Add New to add a new plugin.
Step 4: A new page for adding a new plugin will appear. On the top right, you’ll find a search box. Type Sticky Menu, then Install and Activate it.

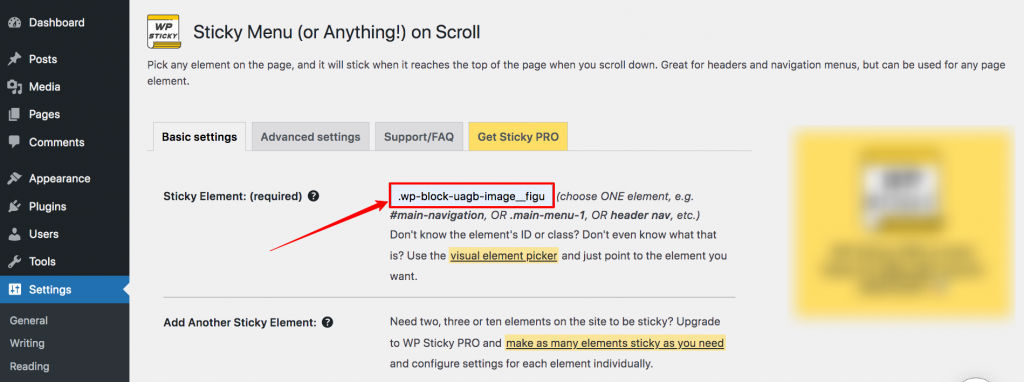
Step 5: After activation, the plugin page, find the plugin, and click on Settings.

Step 6: Now, you’ll find a new page where you can find all the settings of the Sticky Menu. On the Basic settings, you need to fill the Sticky Element section. Paste the class/id that we copied earlier. (Add a ‘.’ before the name for the class, add ‘#’ before the name for id)
On that page, you can customize the sticky sidebar in WordPress site. For the sake of simplicity, we’re skipping any customization.
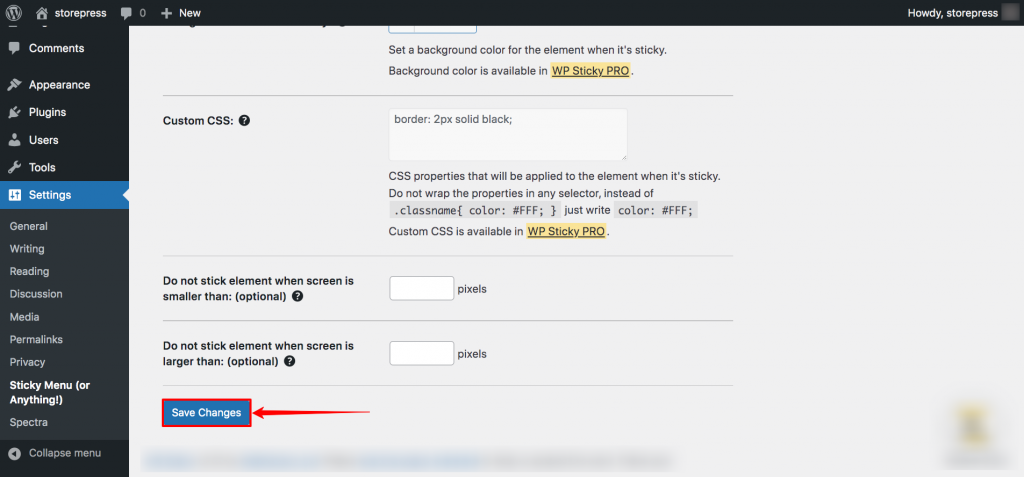
Step 7: After setting all these up, scroll down and click on Save Settings to save the settings.
Preview
After saving that, your sticky sidebar will be created and will be displayed like that.

Conclusion
Setting the sidebar as sticky is a straightforward process that anyone can follow. Using the full power of the sticky sidebar requires more technical expertise. If you’re a non-technical person, you may consider a pro version for the extensive use of the sticky sidebar on the WordPress website. You can also choose plugins from our WooCommerce WordPress plugin list suggestions. If you’re facing any issues while setting this up, feel free to drop a comment, and we’ll try our best to help you.


