WP Super Cache is the best WordPress cache plugin that helps to optimize WordPress-powered websites. Using it, you can optimize your site to the maximum, and decrease the loading time of your website to the minimum. Moreover, the optimization gives visitors a faster, and smoother user experience. That’s why you need to configure WP super cache to optimize it well.
What Is WP Super Cache
WP Super Cache is an Automattic plugin that displays static HTML files instead of dynamic files on your website. It reduces your website’s loading time and makes the site faster. Moreover, it handles the heavy lifting of PHP scripts to run your site smoothly. You can easily speed up the WordPress WooCommerce store by using this plugin.
How to Install WP Super Cache
Go to the WordPress dashboard, hover on Plugins, and click on Add New.

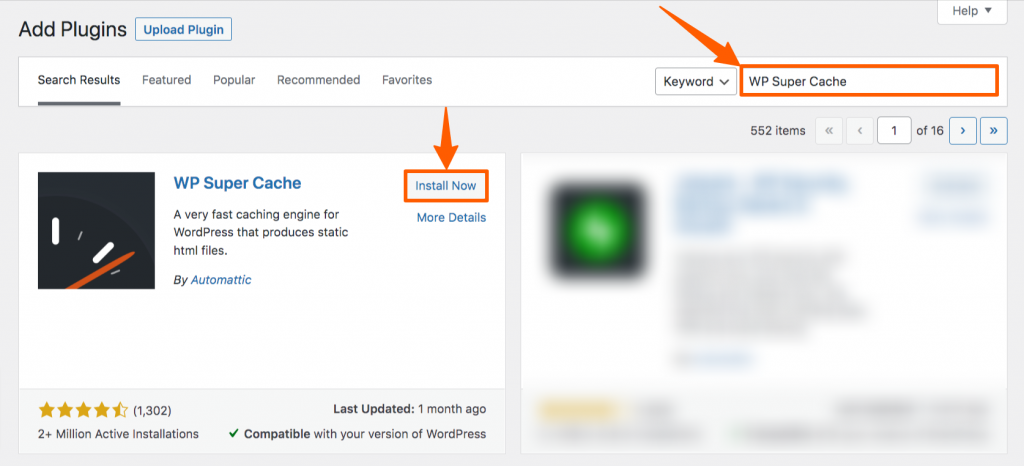
In the Plugin repository, search for WP Super Cache, then install and activate it. Follow WordPress plugin installation guide if you face any issue there.
How to Setup & Configure WP Super Cache
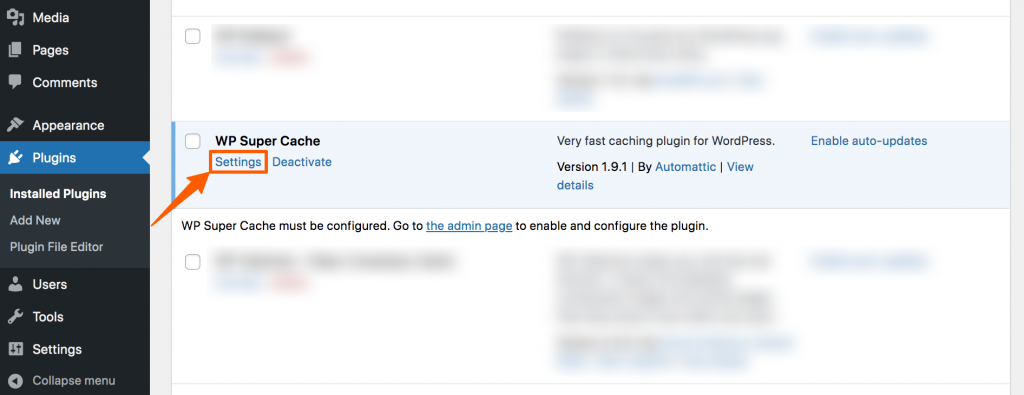
After activation, you’ll be automatically redirected to the WordPress Plugin list. Otherwise, go to the Installed Plugins manually. Then hover on WP Super Cache, and click on Settings.
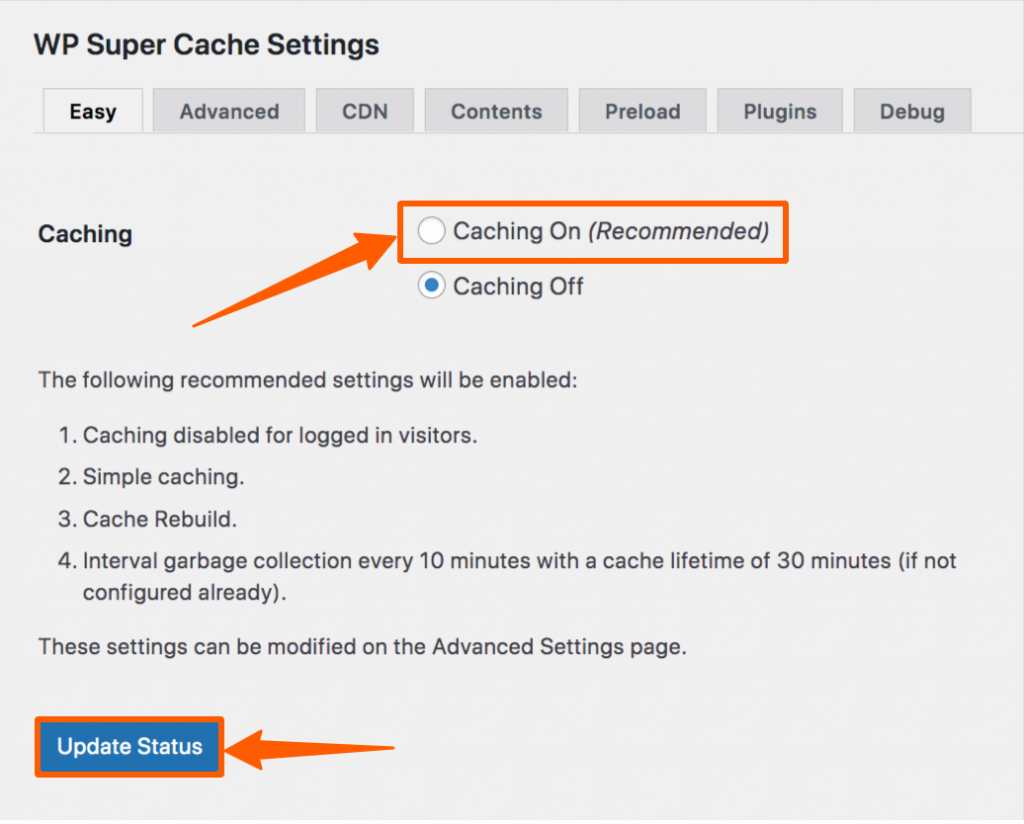
Now, you’ll be redirected to the WP Super Cache Settings. On that page, turn on the Caching, then click Update Status.
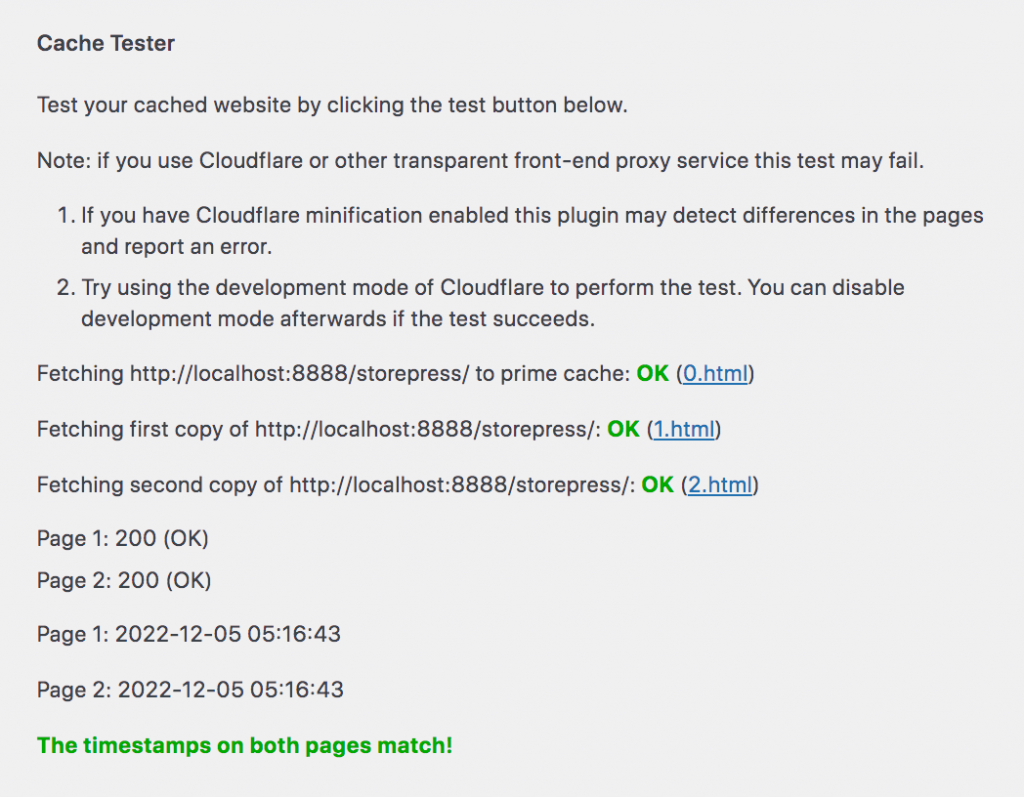
After updating it, click on the Test Cache to test it.
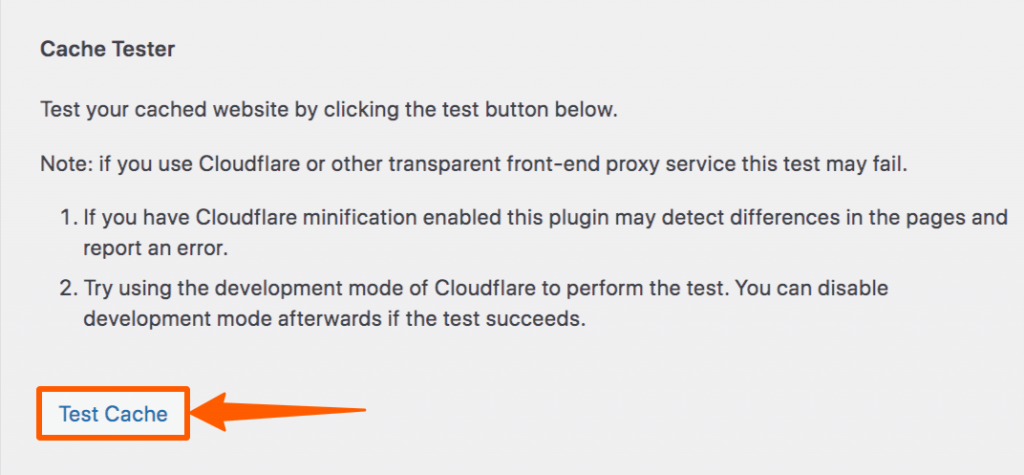
You’ll get the test result immediately. Generally, you won’t face any errors at this stage. If you’re using Cloudflare, you may face some errors and sometimes you may face common HTTP errors. Try to solve them by following the error message they give you. In our case, everything seems fine. If you’re doing everything properly, you should see a page like this one.
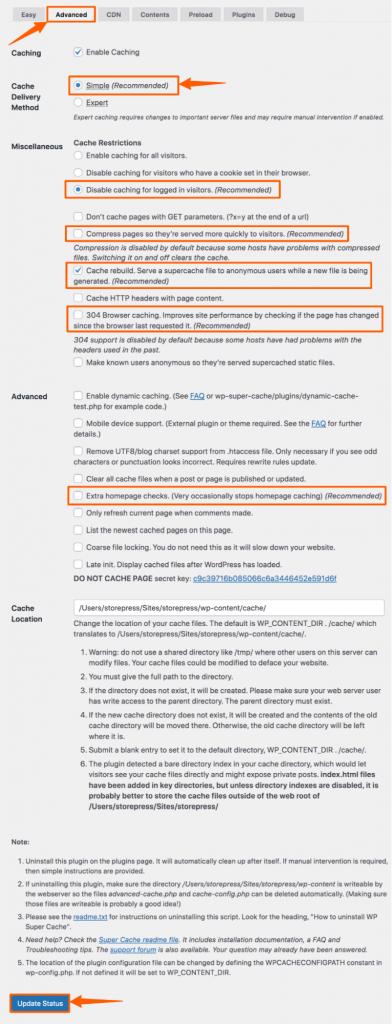
Then click on Advanced, and set cache delivery method Simple to keep it simple, and choose your desired options from there. After selecting them, click on the Update Status button at the bottom to make it effective.
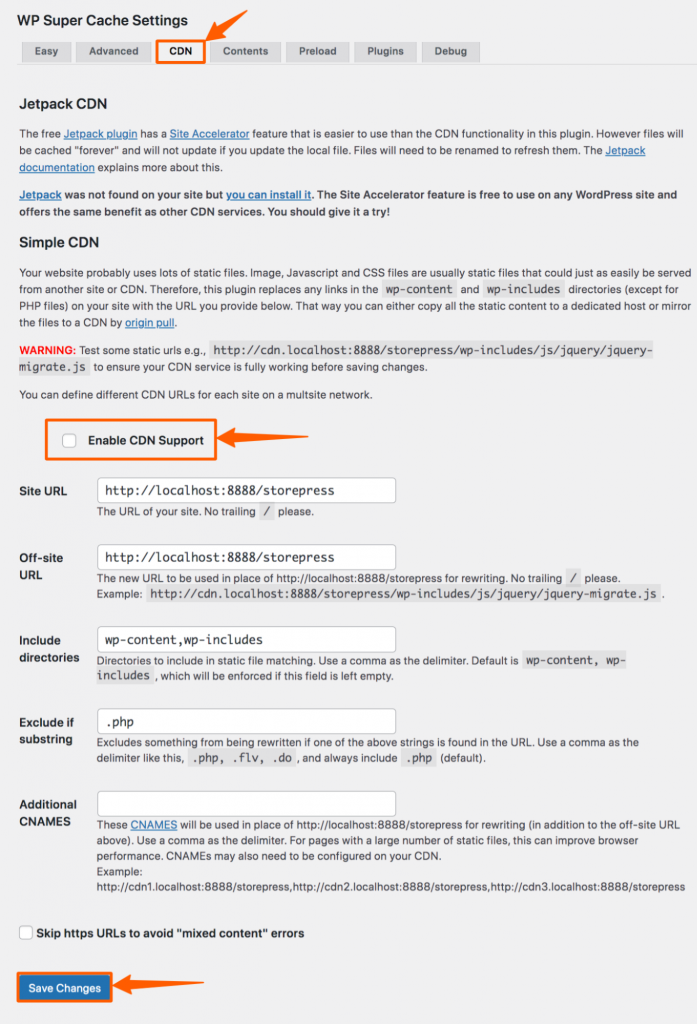
Then click on the CDN, enable it, and Save it.
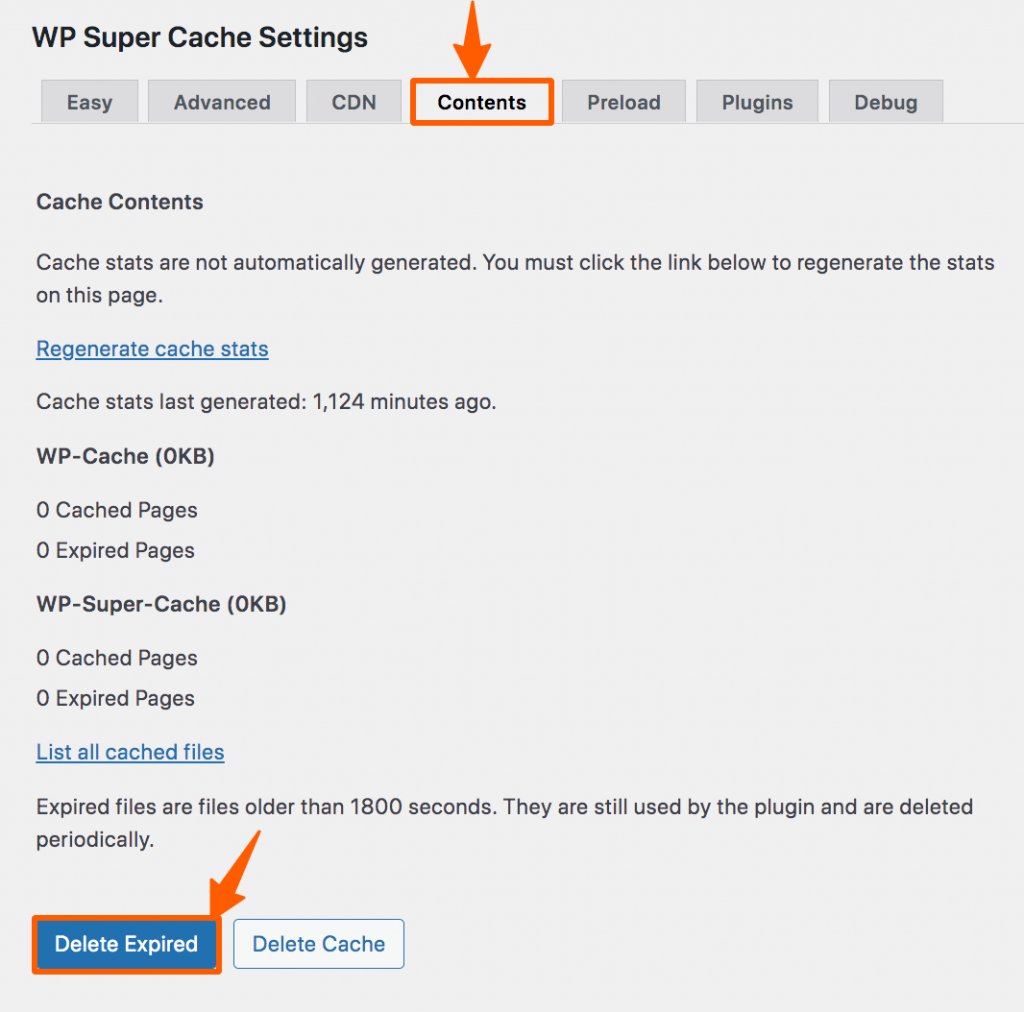
Then go to the Content and Delete the expired data.
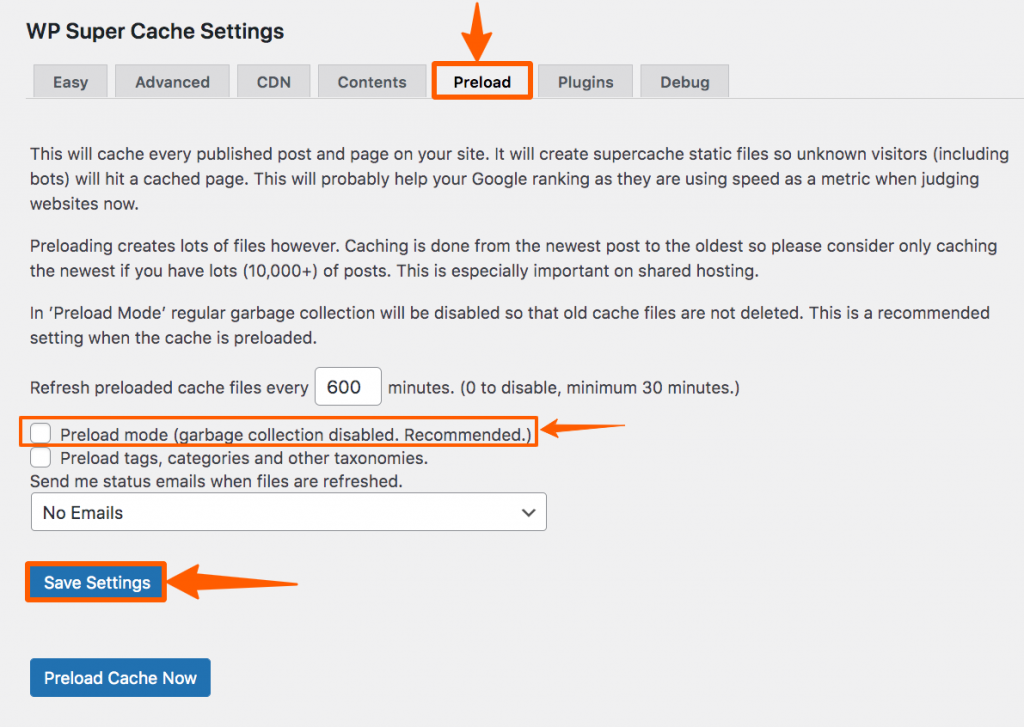
After that, click on Preload, enable preload mode, set refresh preload time, and save settings.
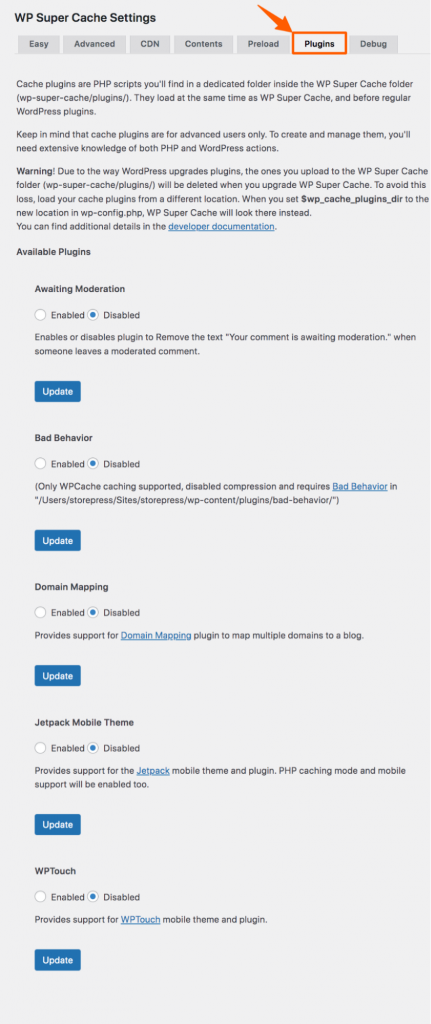
Then click on the Plugins to enable or disable some functions. Choose according to your need, and click Update button to make it effective.
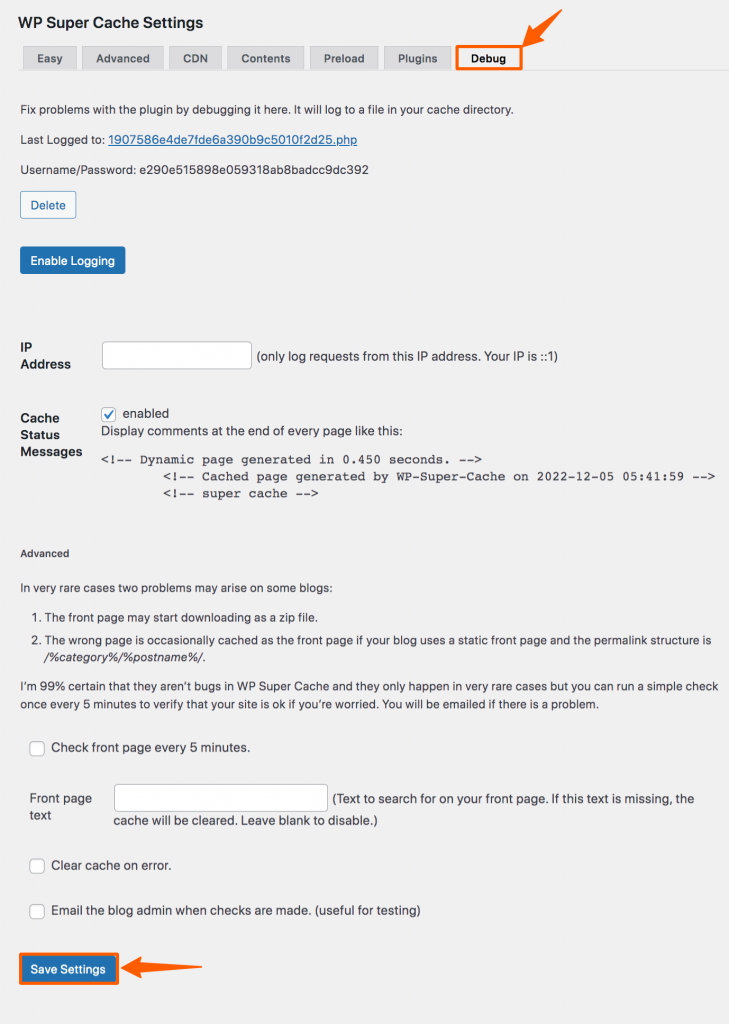
Click on the Debug, set the settings according to your need, then Save settings.
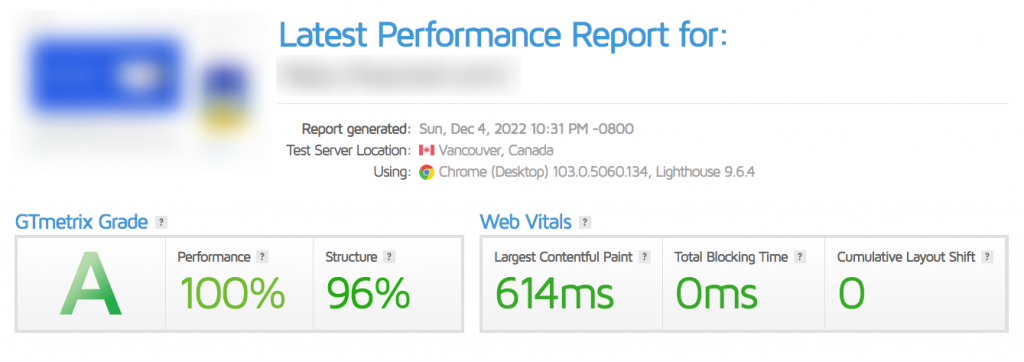
Now, WP Super Cache is configured for your site. You can see the differences when you start browsing your site. If you are having difficulty telling the differences, we recommend you try using GTmatrix before and after configuring WP Super Cache. For demonstration purposes, we’re showing how much it has impacted our website.
Before Configuring WP Super Cache
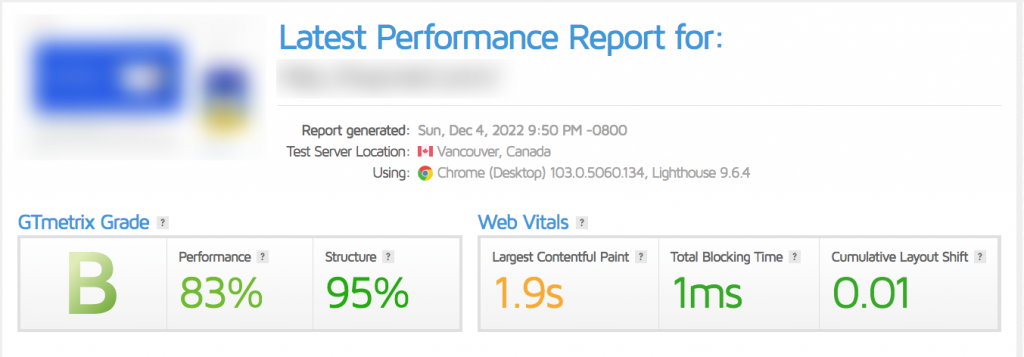
After Configuring WP Super Cache
How to Remove WP Super Cache
In case you don’t want to use WP Super Cache or want to reinstall it. Go to the WordPress dashboard, then hover the pointer on Plugins, and click Installed Plugins.

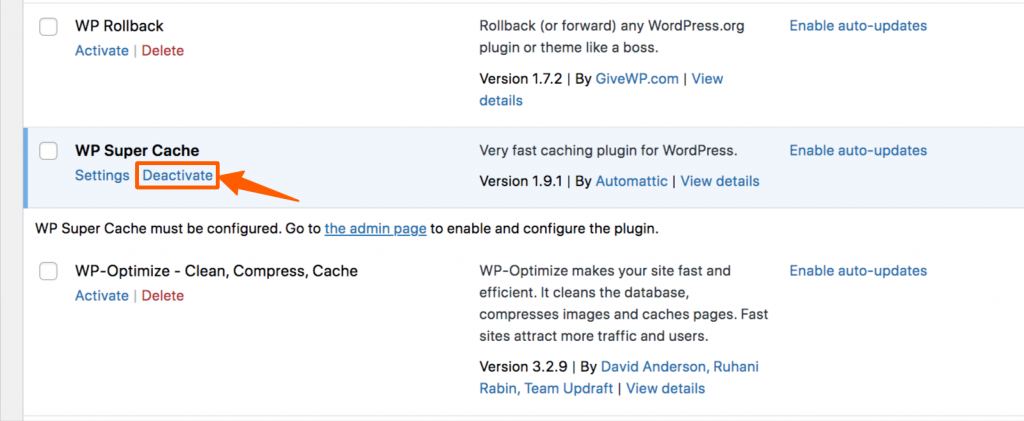
Now, a list of all installed plugins will appear. Find WP Super Cache, click on Deactivate, then click Delete to remove it.
W3 Total Cache vs. WP Super Cache
W3 Total Cache is very dynamic in case of any format of data. But it creates an overload on the server. On the other hand, WP Super Cache is very light that can be run on low-powered servers.
LiteSpeed vs. WP Super Cache
LiteSpeed and WP Super Cache both perform the same task. But LiteSpeed gets more attention for its diverse functionalities. Though LiteSpeed has more functionalities, you need to purchase its web server. On the other hand, WP Super Cache is free to use.
WP-Optimize vs. WP Super Cache
WP-Optimize and WP Super Cache both do similar operations. You can choose any according to your need. WP-Optimize has a free version with limited functionalities. You need to purchase the premium version to use its full power. Besides, WP Super Cache is free to use. You can use all its functions of it without any cost.
Conclusion
The impact of using WP Super Cache is significant, and you can measure it easily. If you want to see how WP Super Cache can impact your site, try using a speed-measuring tool for your website, such as GTmatrix, Pingdom, etc. Try using them before using WP Super Cache and after using WP Super Cache. You can see the differences all over time. Besides that, you can use faster WordPress themes to ensure the best performance. you can also clean the Instagram cache to increase your site speed in the Flatsome theme.


