The support team of a website needs various accesses for the nature of the work. It’s a straightforward process to add users to WordPress for them. You can easily know how to add user to WordPress by using this tutorial. Also, you’ll be able to add different types of role login accounts according to your need. WordPress offers 6 types of roles, from which you can choose.
There are two ways of creating a user for support team members.
- Creating a User Admin Login for the Support Team
- Creating a Custom Login User for the Support Team
Both ways are secure and easy to set up. If you don’t have any issues sharing admin access with your support team, you can choose the first method, which has 4-steps. Otherwise, you can try the second method, where you can control and customize the user’s every permission. You can take help from the WordPress team member plugin to manage your members easily.
Let’s explore both processes and choose according to your need.
How to Add user to WordPress for the Support Team in Flatsome
Method 1– Normal User Admin Access by Adding a New User Manually
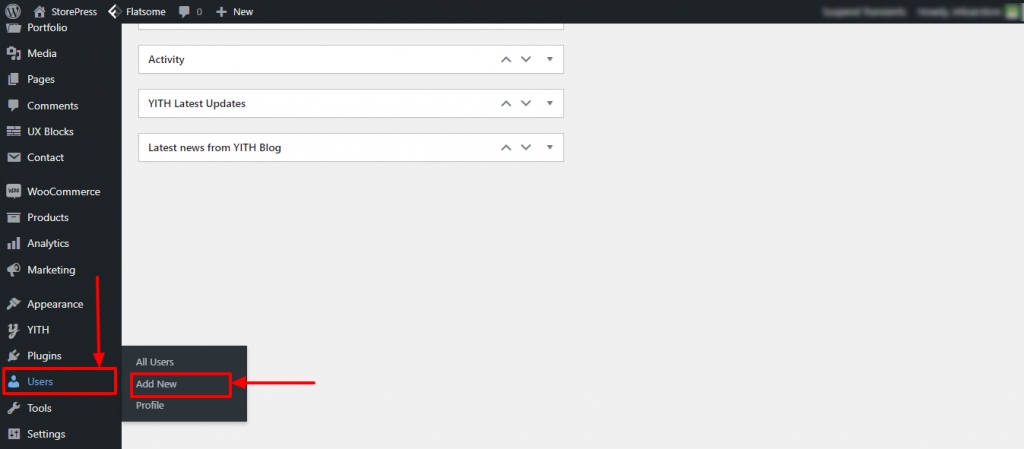
Step 1: Go to the Dashboard, and hover the pointer on Users that can be found on the left bottom. Then click on the Add New to add a new user for your site.
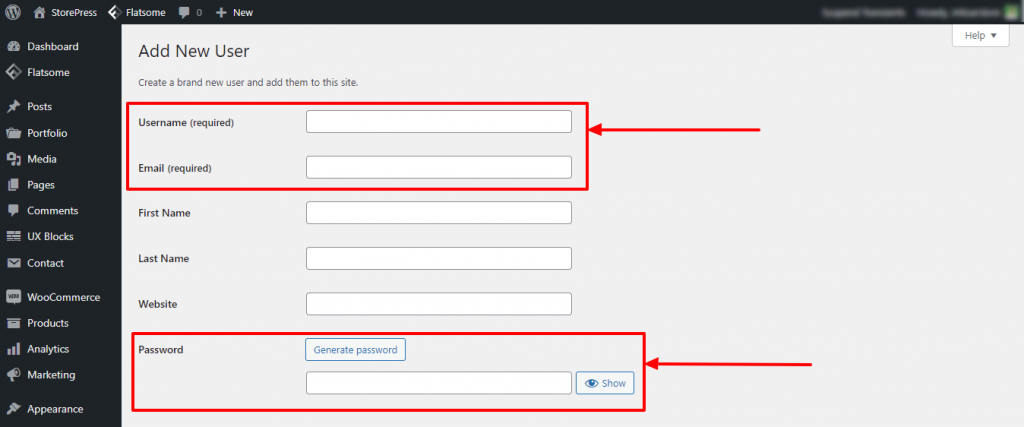
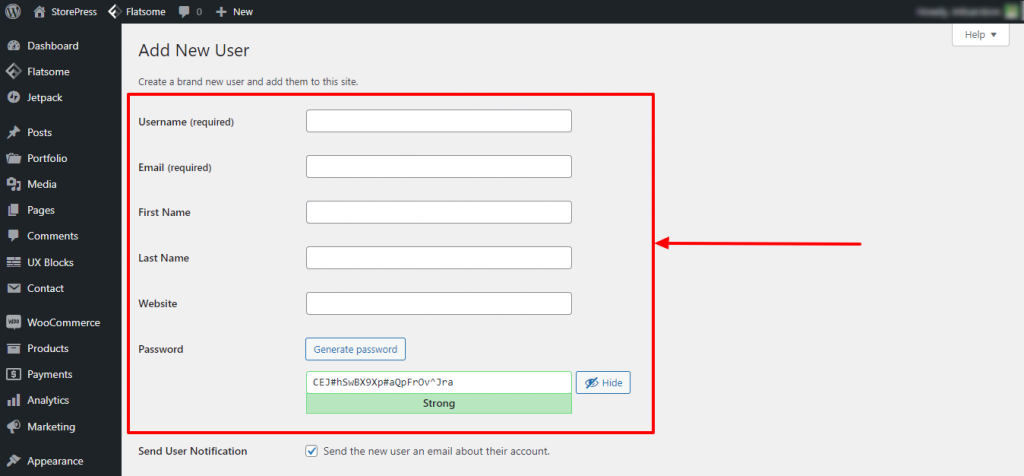
Step 2: A new page will appear, where you need to submit general information. Make sure you’ve filled up the page properly with the correct information.
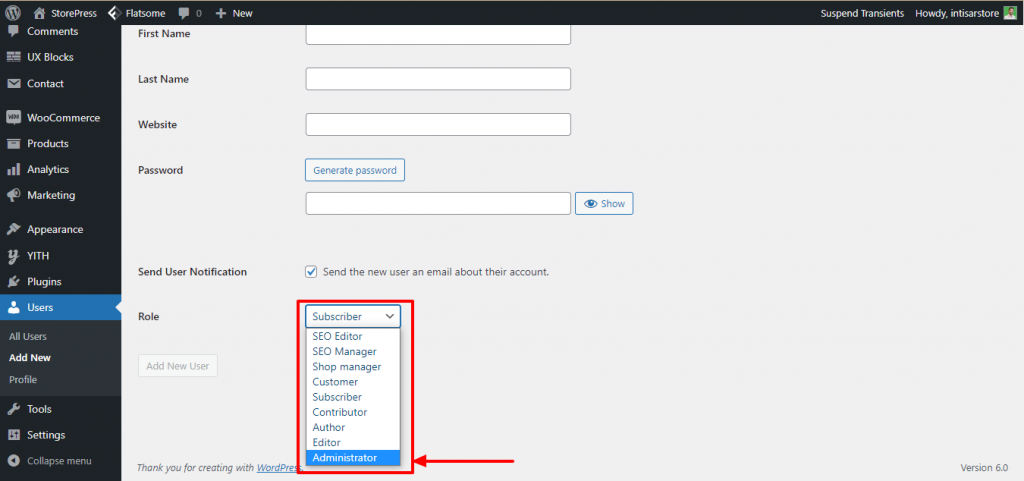
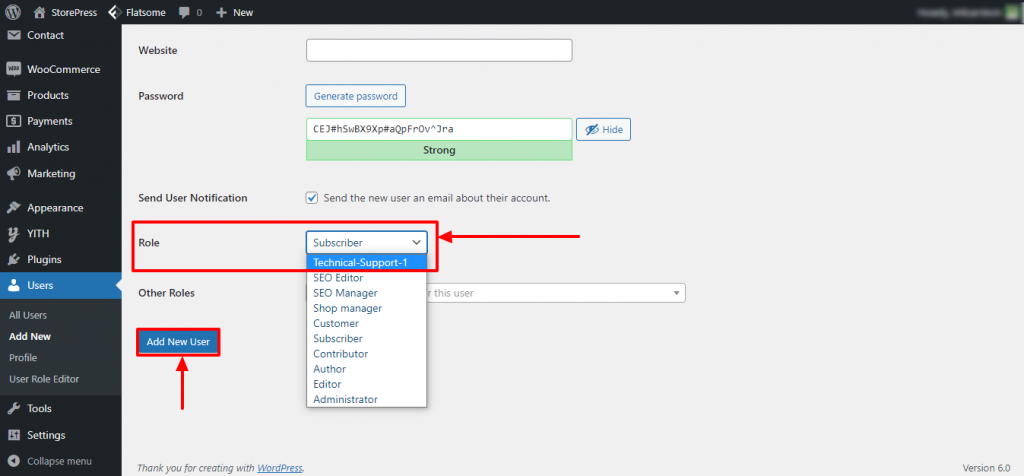
Step 3: Scroll down, set a password, and click on the role you want to add. We’re selecting an Administrator.
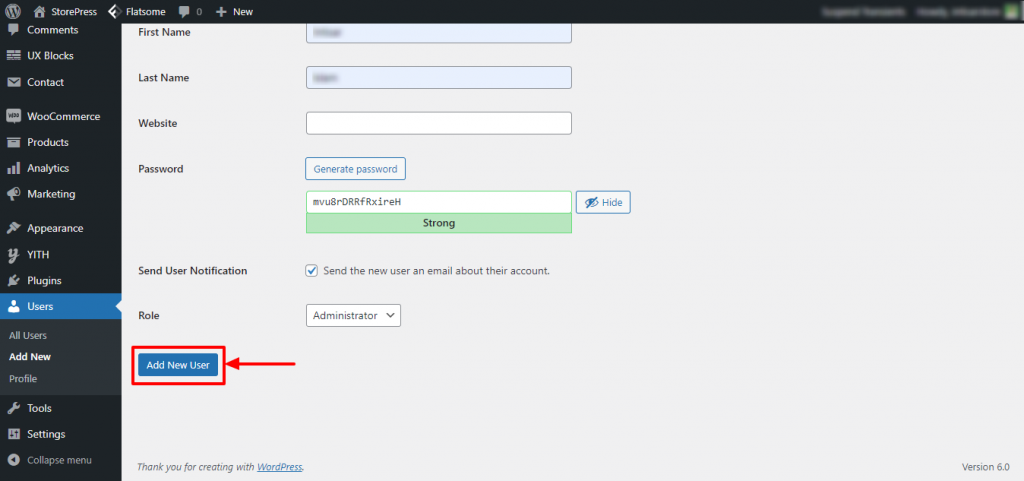
Step 4: After selecting the role, you’ll find a button named Add New User.
Now, you’ve successfully added a new user admin to your site. Give the user the username and password so that s/he can log in to the site.
Method 2– Custom User Access Setting Using Plugin
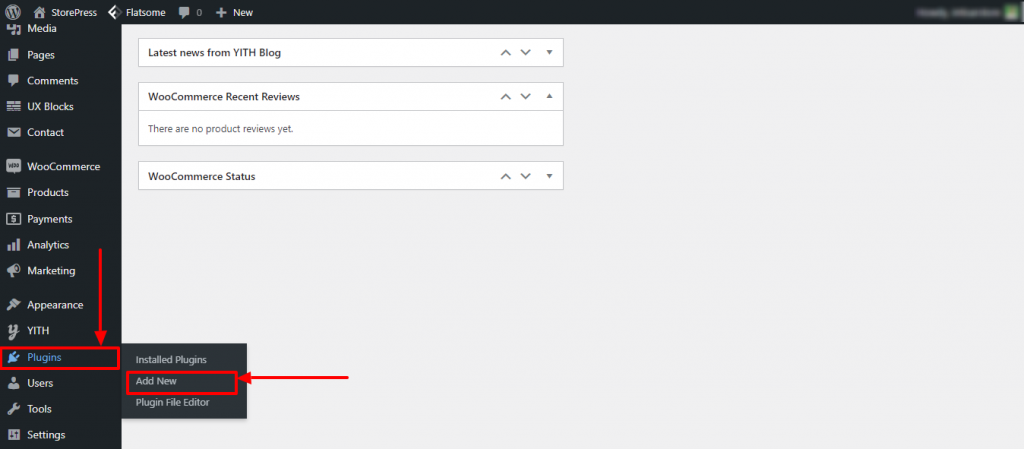
Step 1: Go to the Dashboard, hover the pointer on the Plugins, and click on the Add New
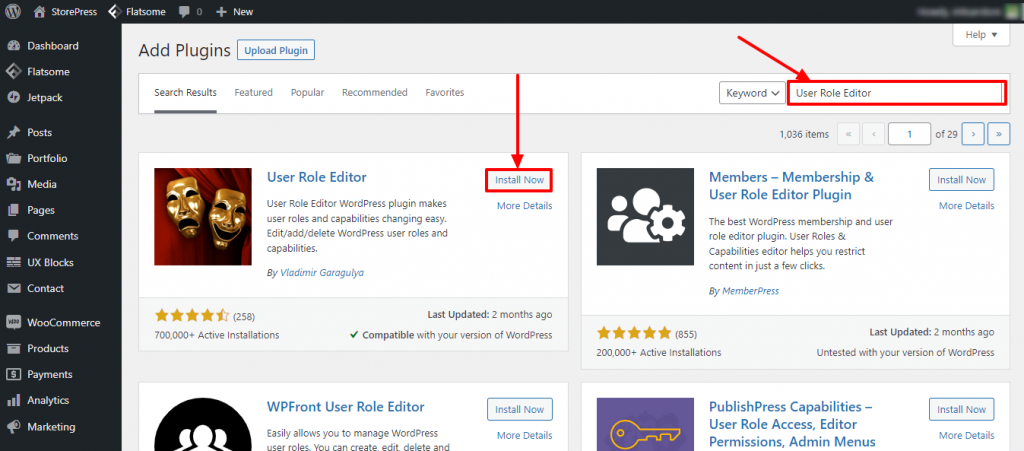
Step 2: A new page of plugins will appear. On the top right, you’ll find a search box. Click on that, and type User Role Editor. Here, you’ll find a plugin named User Role Editor, install it and activate it. you can also use different kinds of user management plugins in WordPress.
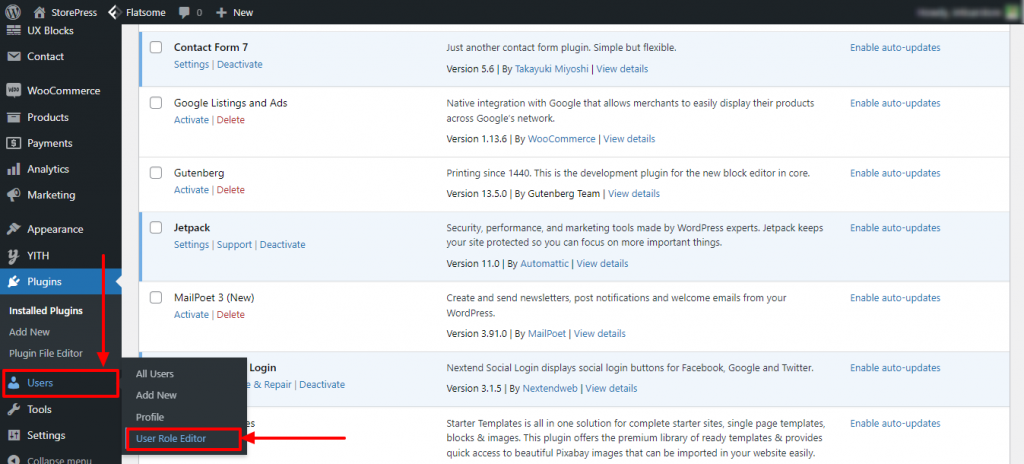
Step 3: After activation, hover the pointer on User, then click on the User Role Editor
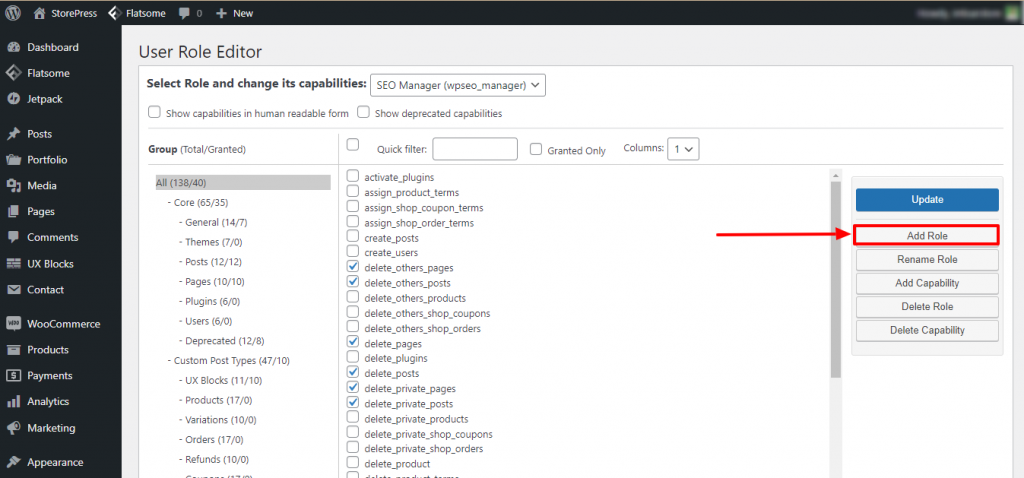
Step 4: A new page will appear. On the right side, click on the Add Role on the right side to create a new custom role.
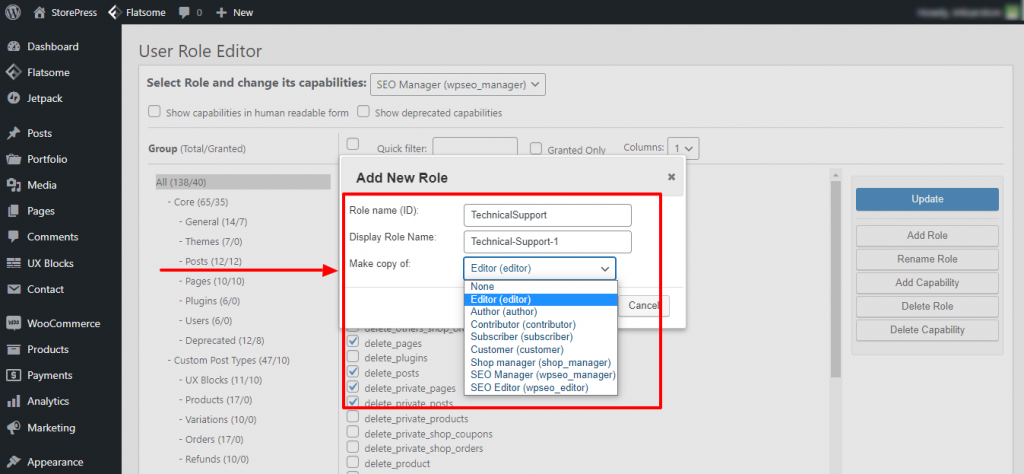
Step 5: A popup named Add New Role will appear. Type the Role Name, Display the Role Name, and select the Copy of the Access Level or select None to make it fully custom. For demonstration purposes, we’re selecting Editor. Then click the OK button.
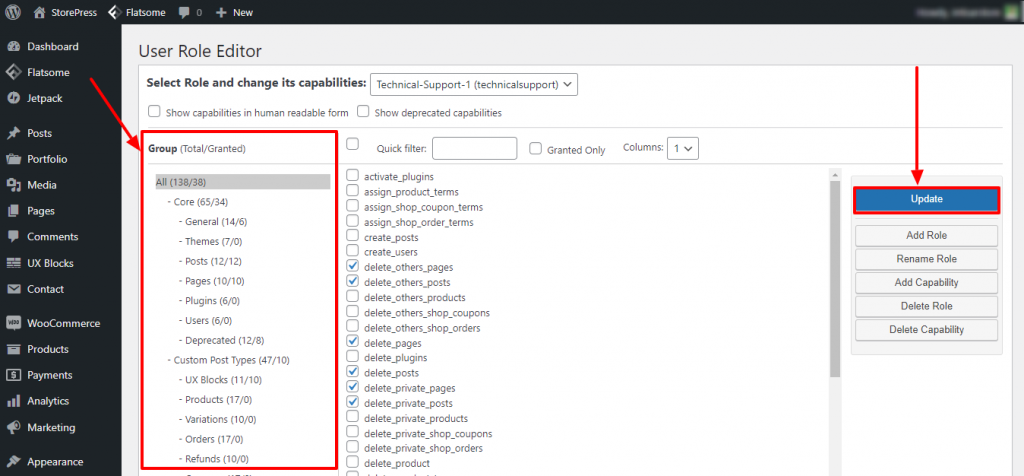
Step 6: Now, you can fully control how much access the new user type can have. Go through those permissions and select/unselect according to your need. Then click on the Update button on the right side.
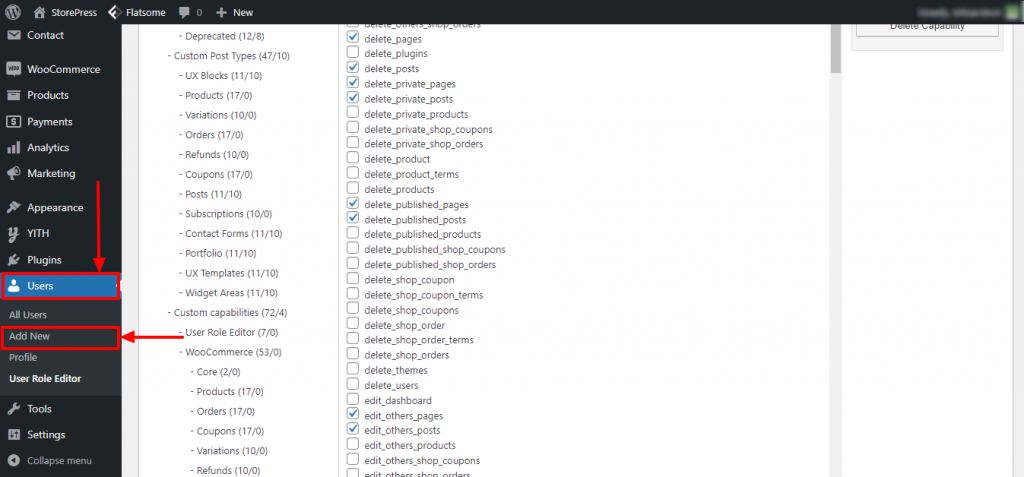
Step 7: Then hover the pointer on the Users, and click on the Add New to add a new user
Step 8: A new page will appear. A form will appear, and fill up the required fields.
Step 9: Then scroll down, and select a role. We’re selecting Technical-Support-1 for demonstration purposes. Then click on the Add New User button.
Now, you’ve successfully added a new user to your site. Give the user the username and password so that s/he can log in to the site.
Conclusion
Besides creating a user’s account, you can also add an author account, page manager account, and much more default accounts. Find the level of access you need to give and create an account according to it. You can also set membership with the help of the membership plugin in WordPress.
Access to the website is sensitive, don’t use a common password or give unnecessary access to anyone. Moreover, don’t panic if you face any HTTP error while logging in. This doesn’t mean your site is hacked or something terrible happened. It’s a common scenario in WordPress sites; you can quickly fix HTTP errors on your own.


