Customizing the product page is an excellent feature of UX Builder. This tutorial discusses how you can Customize WooCommerce custom product pages using UX Builder. After reading the full article you can easily Customize WooCommerce Product Page with some simple steps.
An online store is more complex than a regular website. That’s why you need to use a UX builder for customization. It helps to design your WooCommerce store with a visual, drag-and-drop interface.
For any eCommerce shop, user experience(UX) is one of the most important features. So, to make an eStore beautiful and modern, you need to have a better UX. To solve this problem and give every website a better UX by default, Flatsome introduced the UX builder. It’s an awesome tool that can help you to build a responsive site without writing a single line of code! You can create a web page header design with a UX builder.
To make it easy for you, we have created a video tutorial on how to customize the WooCommerce product page using UX Builder. Using this article or video, you can customize the WooCommerce product page using UX builder. Follow any that works for you!
How to Customize WooCommerce Product Page using UX builder
To follow the text instructions, you can continue reading the version below.
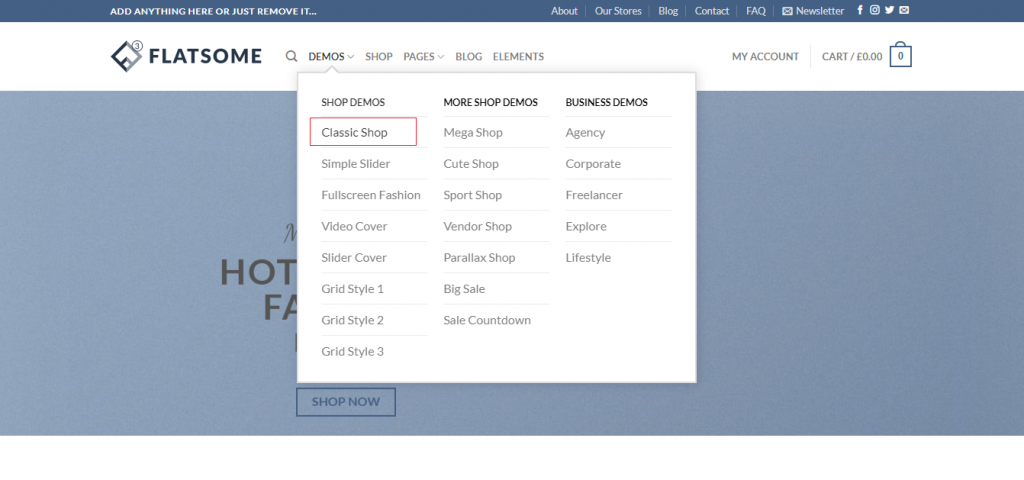
Before heading to the product page customization, let’s select a product layout page that we will customize in this tutorial. We’re selecting a product from Classic Shop for demonstration purposes. However, you can select any from the list.
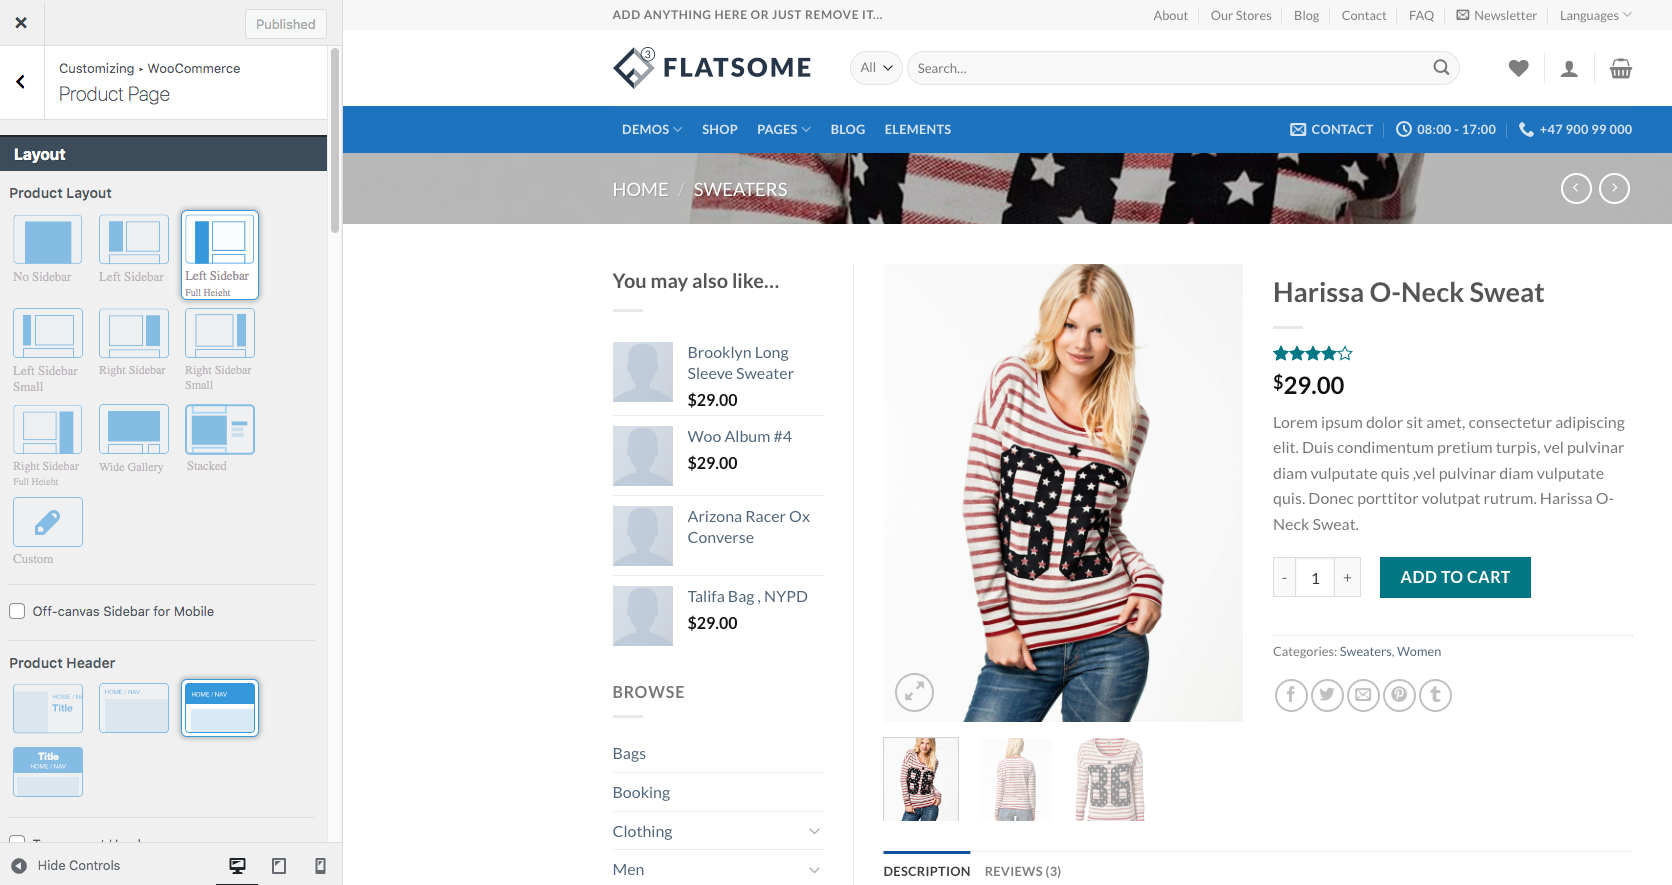
In the product customizer, you’ll see any product like this by default. We’ll customize this page according to our needs. For demonstration purposes, we’ll set a sidebar menu to the right and rearrange the basic information.
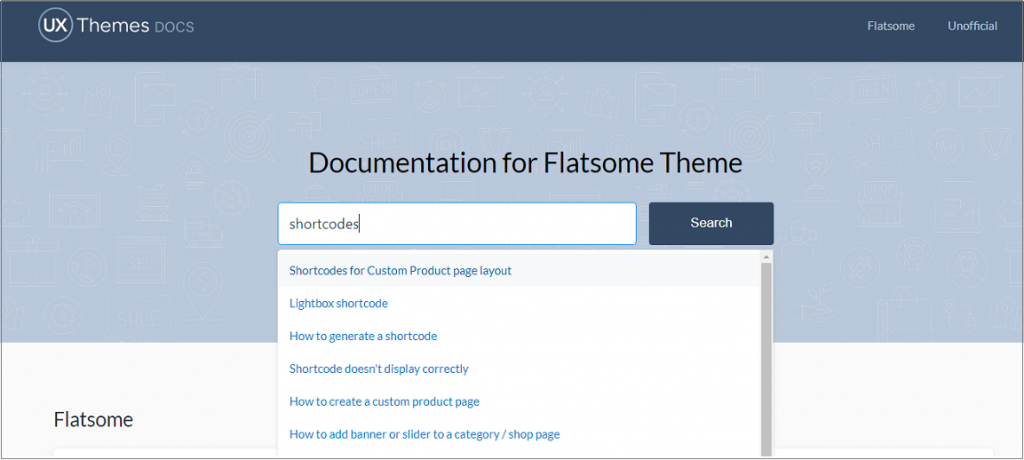
Step 1: To customize this product page without manually building page elements in UX Builder, you have to go to the Flatsome official documentation. After that, you need to search for the Custom Product Page Layout shortcodes.
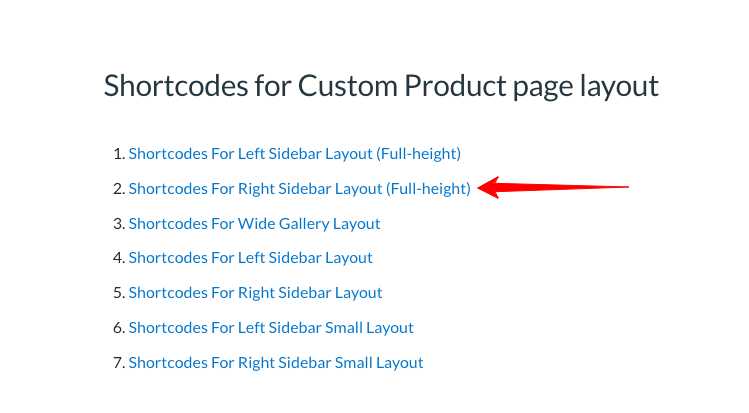
There is a list of shortcodes for product page layouts. You can select your desired shortcodes and start customizing them in the UX Builder.
[row]

[col span="9" span__sm="12"]

[row_inner]

[col_inner span="6" span__sm="12"]

[ux_product_gallery]


[/col_inner]
[col_inner span="6" span__sm="12"]

[ux_product_breadcrumbs]

[ux_product_title]

[ux_product_rating]

[ux_product_price]

[ux_product_excerpt]

[ux_product_add_to_cart]

[ux_product_meta]

[share]


[/col_inner]

[/row_inner]
[ux_product_tabs]

[ux_product_upsell style="grid"]

[ux_product_related]


[/col]
[col span="3" span__sm="12"]

[ux_sidebar id="product-sidebar"]


[/col]

[/row]
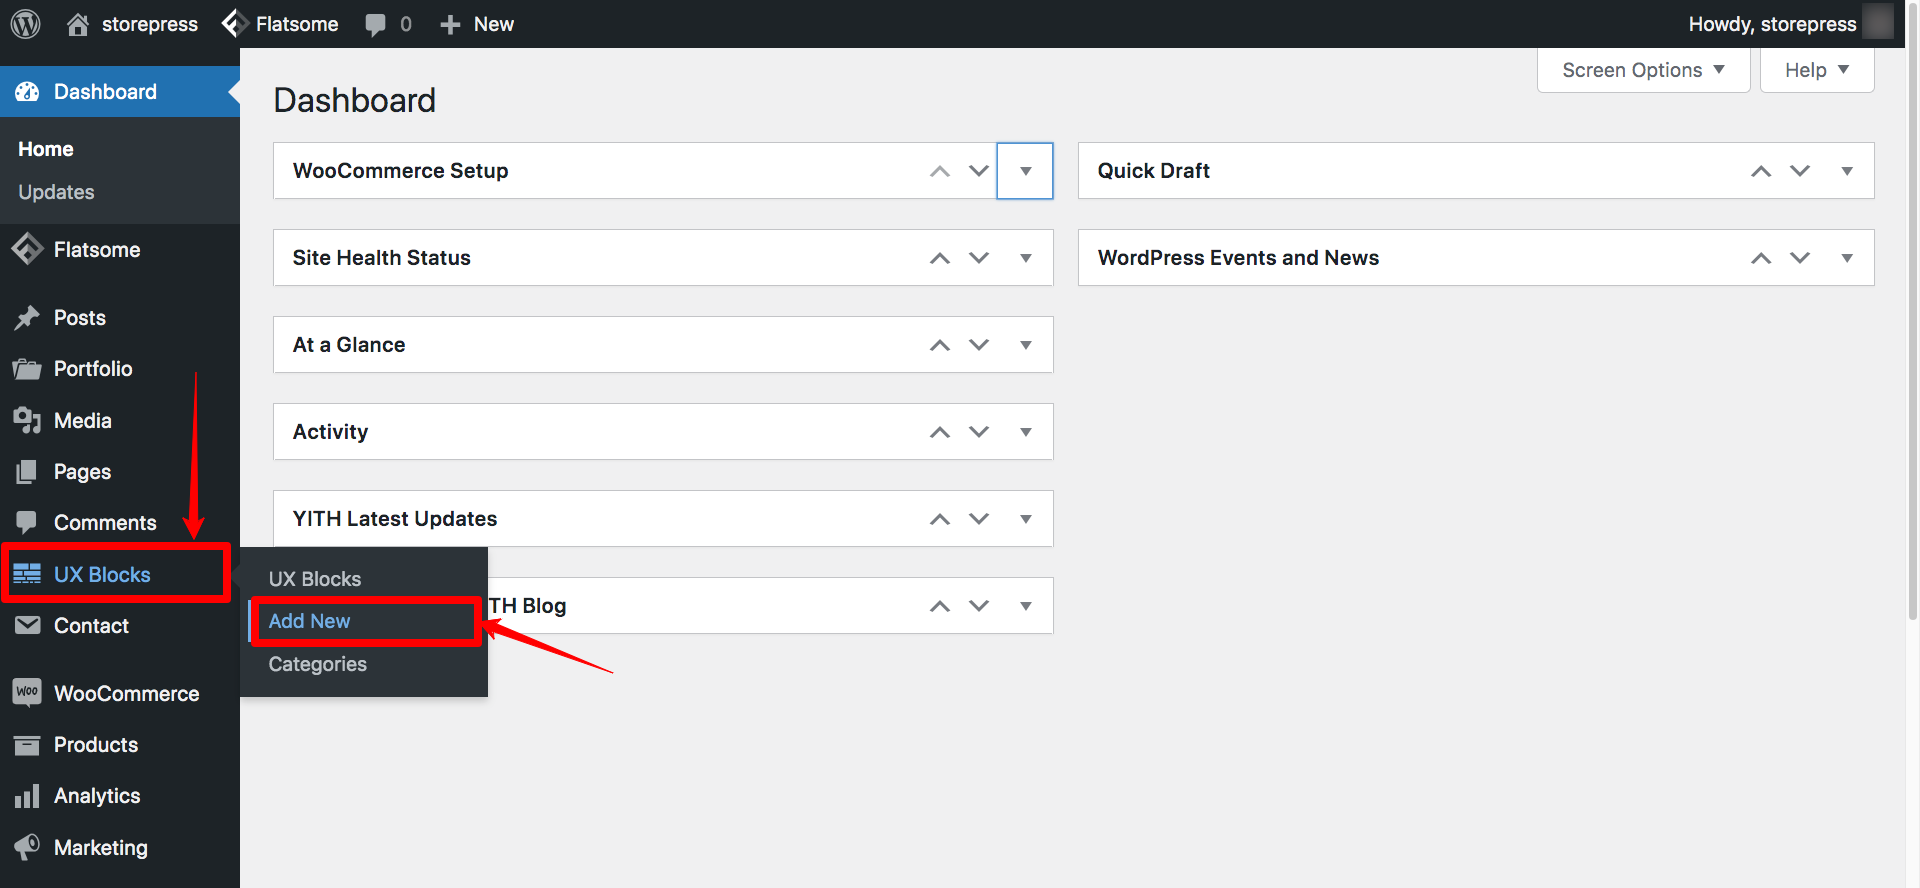
Step 2: Now we’ll create a new block with a title. To create a UX Block, hover the cursor on UX Blocks, then click on Add New.
Step 3: The block can be titled anything, but we will name the title ‘Shortcodes For Right Sidebar Layout (Full-height)’. Then paste the shortcode inside the block editor, which we’ve copied, and clicked on the Publish button.

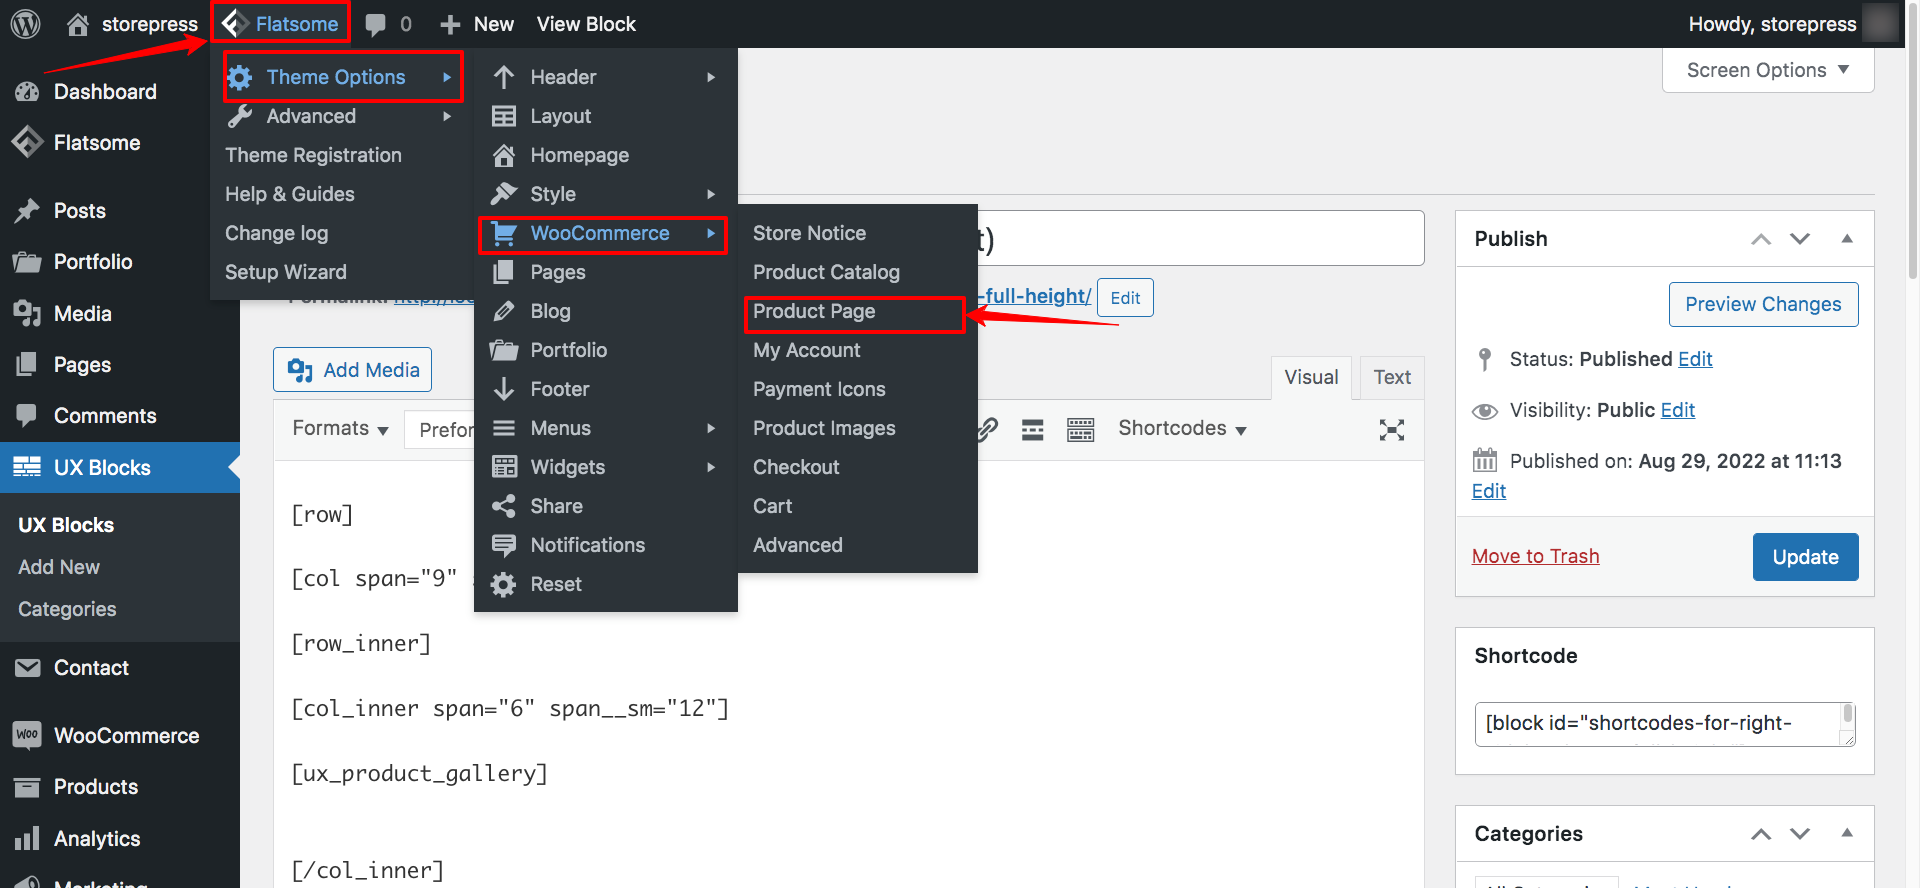
Step 4: We’ve created the UX block, and now we need to integrate it with the product page. To set it on the product page, on Dashboard, hover the cursor on Flatsome, then hover on Theme Options, then again hover on WooCommerce. After that click on the Product Page.
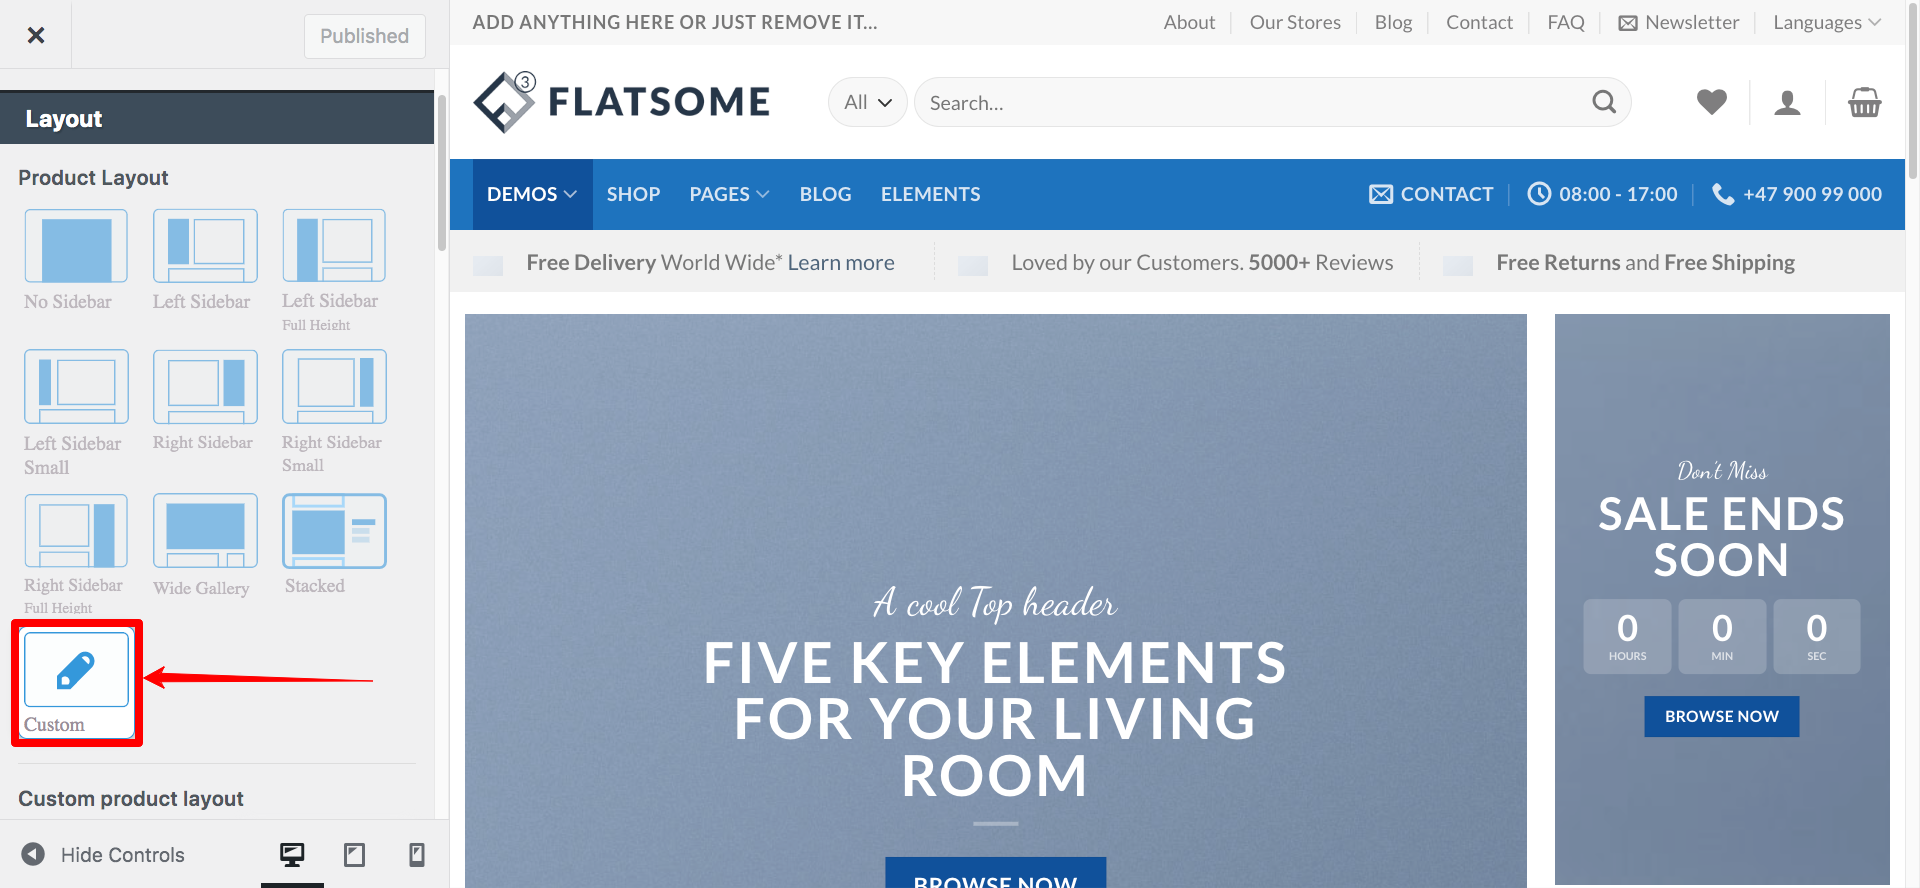
Step 5: A new page of Layout settings will appear. On the left side, you’ll find the Product Layout section, select the Custom layout icon to add a custom setting.
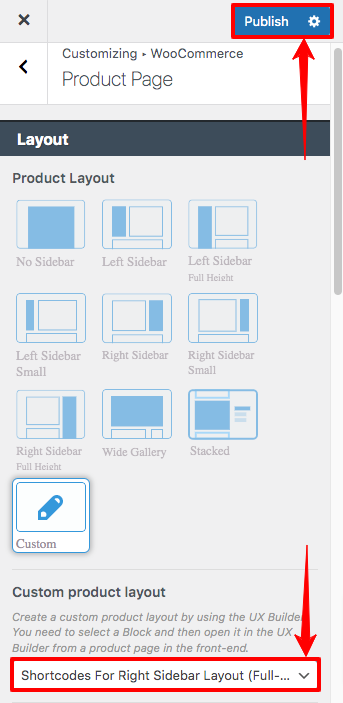
Step 6: After that, you will have to enable your newly created blocks from the Product Layout. Now select the block you just created for the custom page layout. In our term, it’s a Shortcodes For Right Sidebar Layout (Full-height). Once your block selection is completed, click the Publish button to save the settings in the Flatsome theme.
Step 7: Now time to start customizing the product page layout. At first, you’ll have navigated to an existing product page. Selecting a product you have set up completely (like some images, short descriptions, etc.) is recommended. That way, it will be easier to visualize the page section you create.
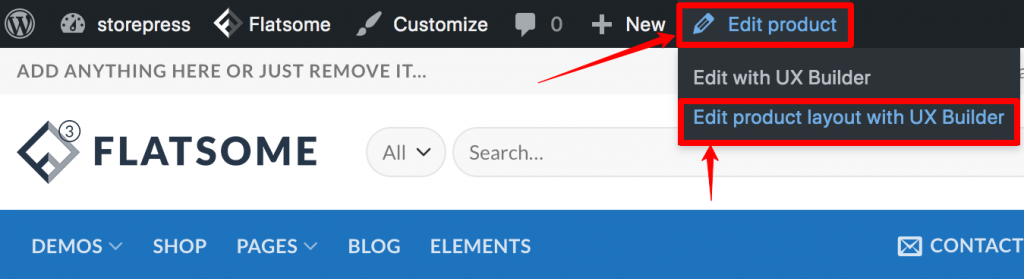
Go to the product page you want to work on. You’ll find the Edit product section on the top. Hover the cursor on that, then click Edit product layout with UX Builder.
Step 8: Once the UX Builder is opened, you can notice the Product Page elements available in the left side panel. This is the block that we’ve created at layout shortcodes from the documentation. You can change the positions of the elements by moving the elements on the live page or the left side panel.
For demonstration purposes, we’ve moved the position of the price, add to cart button, share buttons, and rating. On the right side with the help of review plugins for WordPress, you’ll find a blank column where you can add what you want. To do that, click on the “+” button.

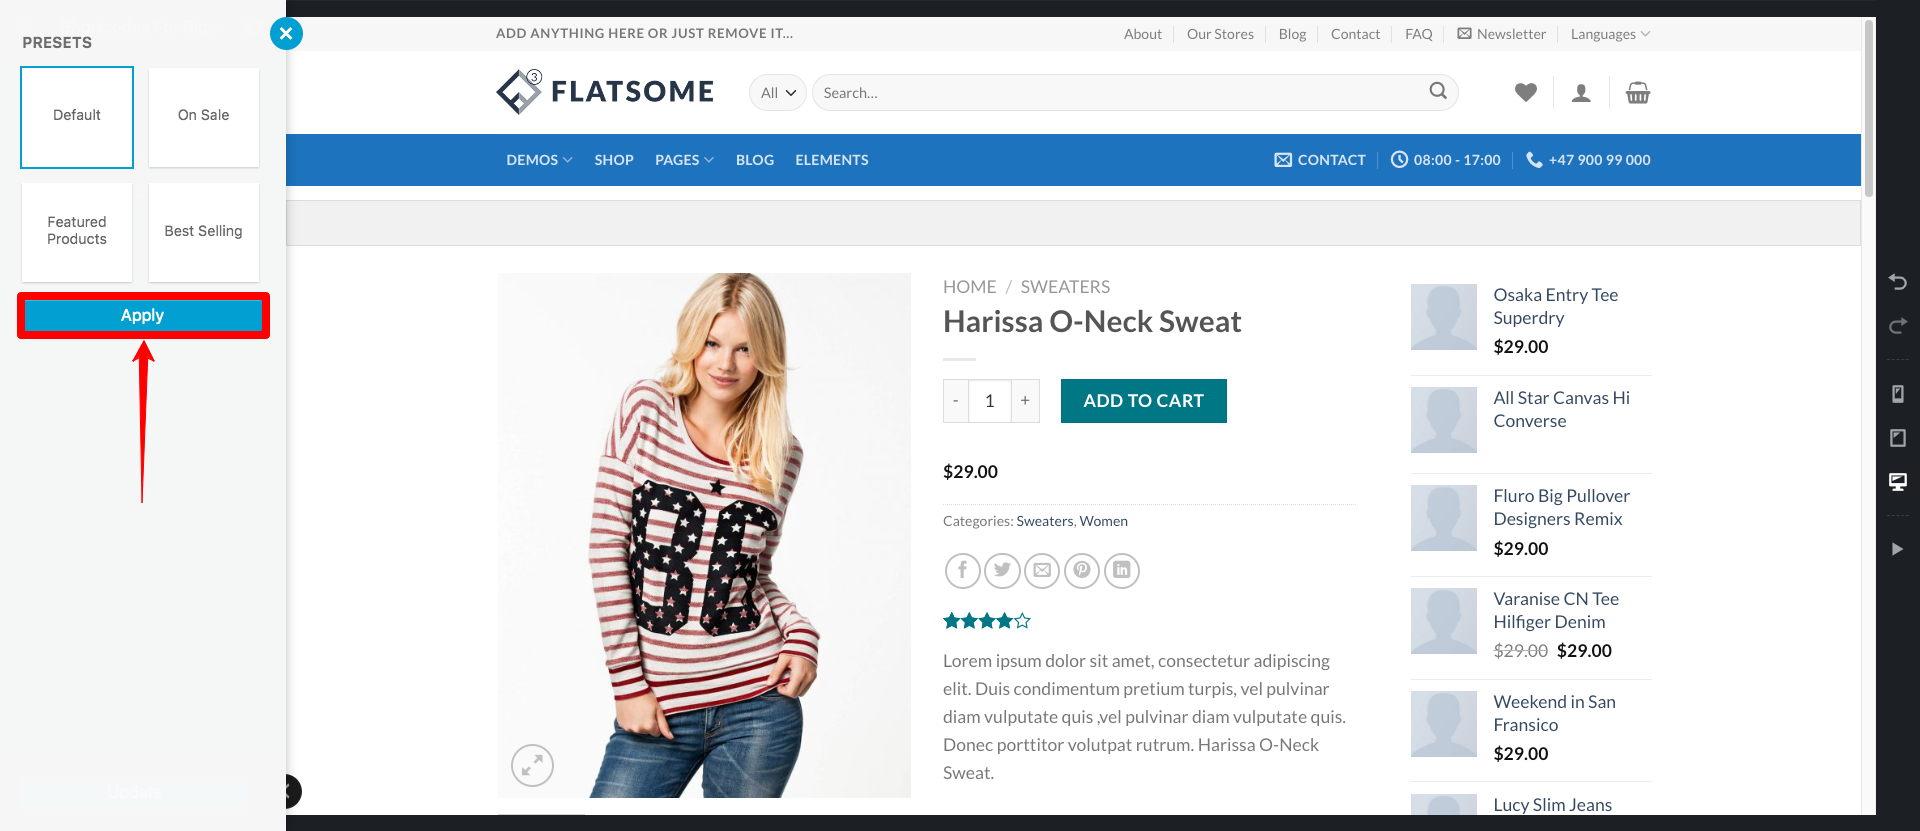
Step 9: There are some pre-made elements in the left side panel from which you can add any on the right side column. For demonstration purposes, we’re selecting “Product List“.

Step 10: After selecting that, a new section on the left will appear. Select any as your need, we’re selecting Default for demonstration. Then click Apply.

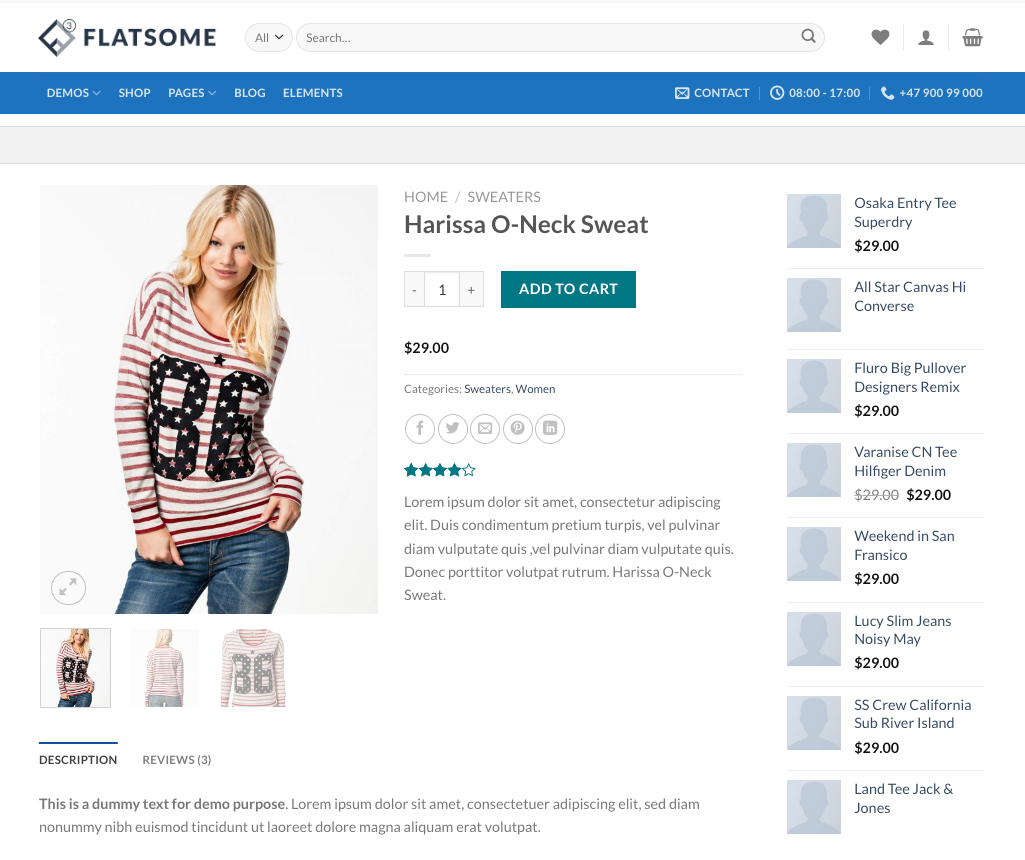
Final Preview 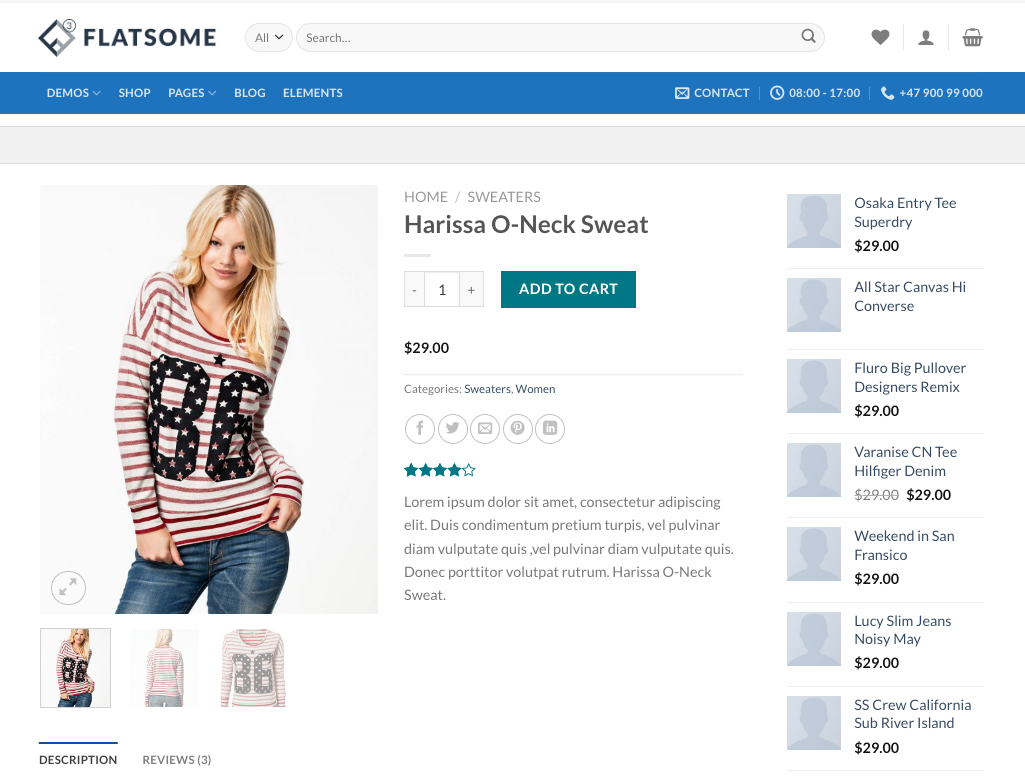
Wrapping Up
Flatsome comes with drag-and-drop functionality and ready-to-go modules. It will help you to customize your WooCommerce custom product pages. You could use different page structures for different product categories.
Furthermore, it leaves clean and readable shortcodes in the content editor.
If you need more tutorials on Flatsome theme or WooCommerce, let us know in the comment section. We’ll write the next tutorial for you.