Sometimes you may face trouble and get complaints from your users they are not getting emails for user registration, lost password, reset passwords, and product order emails. Even, if you WordPress contact form 7, you can get complaints or face an issue like “WordPress Contact Form 7 not sending emails or Contact Form 7 -There was an error trying to send your message. Please try again“. To solve this issue you need to setup WordPress SMTP server, we’re going to explain how to set up WordPress STML Server in the Flatsome-based WooCommerce website. You can know how to add a contact form on WordPress if you want and you can also add google Recaptcha keys for avoiding spamming.
As your Flatsome WordPress theme comes included with Contact Form 7, you may notice the following error very often after submitting the form.

You might be thinking why I’ll use an SMTP server while there is a built-in PHP mail function, right?
PHP mail function doesn’t work for various reasons such as WordPress hosting website limiting the usage of this for preventing abuse and spam.
Popular mail providers have a strong spam filter enabled which check and monitors if those are sent from the authentic mail server or not. Comparatively, WordPress default mail emails sometimes fail to check it. Consequently, either email drops or ends up in the spam folder.
Now, the question is what SMTP server?
SMTP (Simple Mail Transfer Protocol) Server is an application. Its primary purpose is to send, receive and reply to outgoing mail between email senders and receivers. To assure proper authentication to increase email delivery, SMTP is the best solution instead of the PHP mail function. Best WordPress email plugins help to do this process perfectly.
How To Setup WordPress SMTP Server To Sending Emails
As you handle emails to get sent for WooCommerce order notification, reset passwords, user registration, and contact form submissions. Your use Gmail SMTP service. It can easily use to send out emails from Your WooCommerce WordPress website.
To connect your WordPress website with Gmail SMTP. You have to install PostSMTP Mailer/Email Log aka PostMan plugin. So, let get’s started.
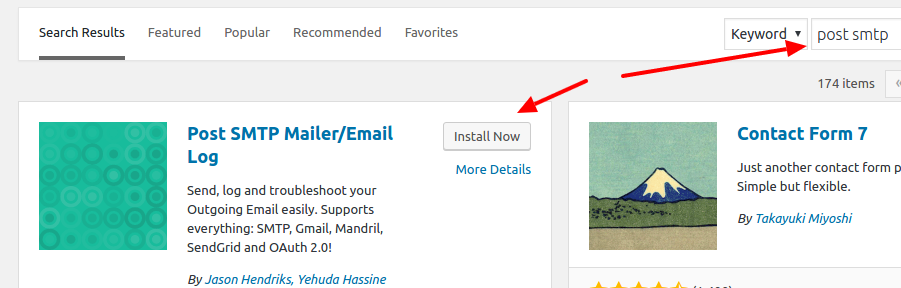
Step 1: Install Post SMTP Mailer/Email Log Plugin
Login to your WordPress Dashboard. And navigate to Plugins >> Add New. Search for “Post SMTP Mailer/Email Log”.
Step 2: Activate Post SMTP Plugin
When plugin installation and activation are completed, a message will appear in the Dashboard to configure Post SMTP plugin. Click on Settings.
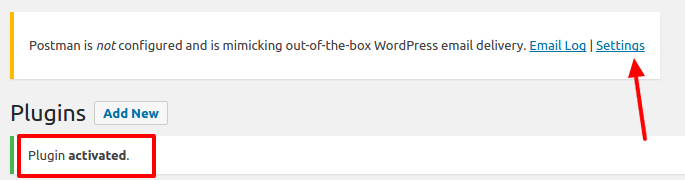
Or find the settings link underneath the plugin link.

Step 3: Run Start The Wizard
From the settings panel, click on the “Start The Wizard” button, and enter your name and email address in the degenerated field. And press Next.


Step 4: Auto Resolve Gmail SMTP Server
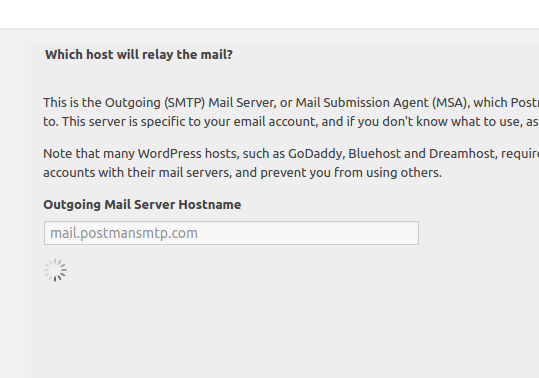
In this step, the system auto-resolves the Gmail SMTP server in a few seconds. When it’s done, click the Next button.
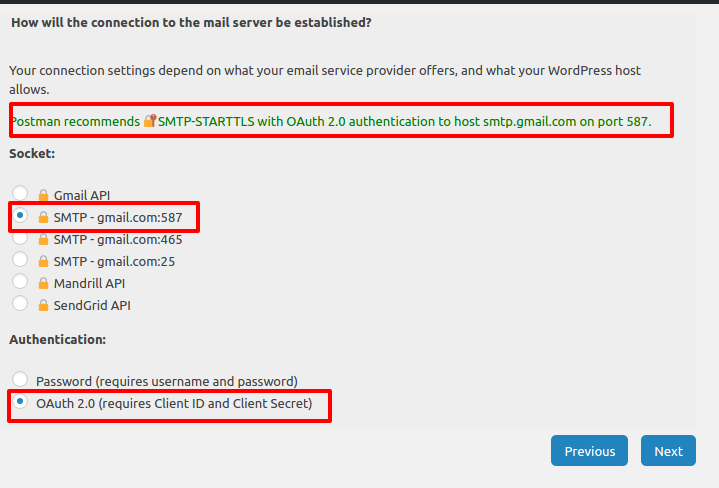
Step 05: Run Connectivity Test And Connect to Mail Server
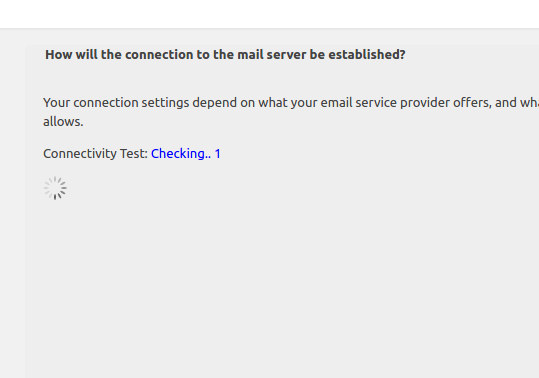
Here, the Post SMTP plugin runs a connectivity test and recommends and selects: SMTP-STARTTLS with OAuth 2.0 authentication to host smtp.gmail.com on port 587 automatically. Subsequently, you can see the following screen one after another.
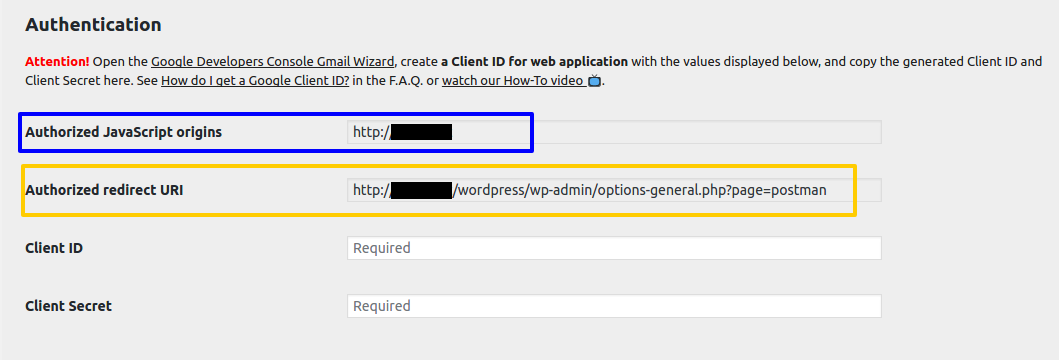
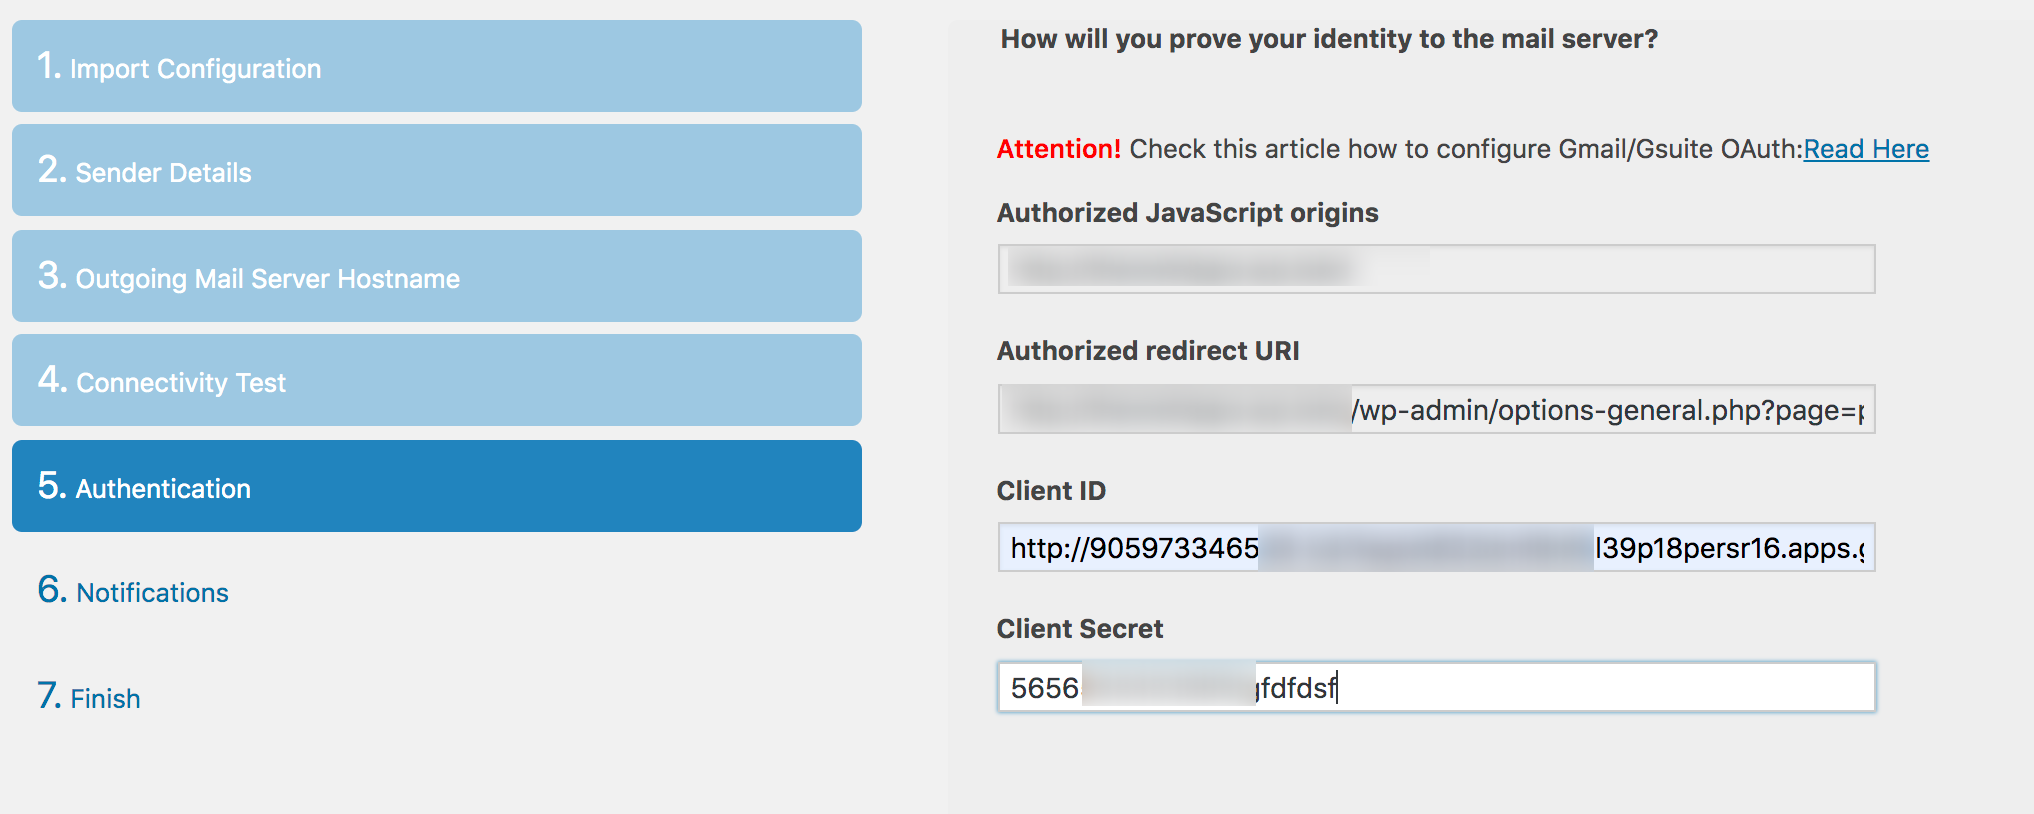
Step 6: Client ID and Client Secret
You are on the Authentication screen now, you will need to input two parameters: Client ID and Client Secret. Now, you need Gmail STMP API details. But noted down, the Authorized JavaScript origins and Authorized redirect URI. You need to add these details in the Gmail SMTP API fields.
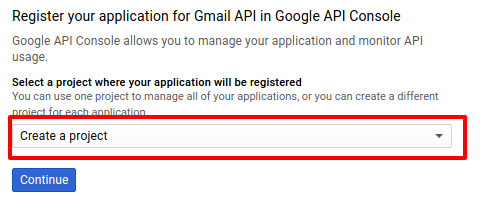
Step 07: Create Gmail API in Google API Console
To get the Client ID and the Client Secret details, visit Google API Console using your Gmail account. When the following screen appears, select Create Project and press Continue.
Step 08: Go To Google API Credentials
The project has been created and Gmail API is enabled. Now press Go to Credentials to add site details to your project.

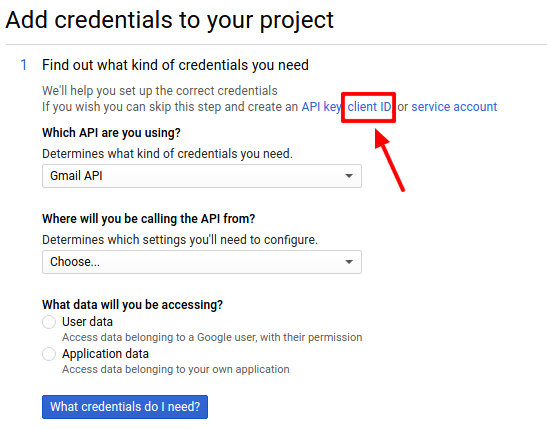
Step 09: Add Credentials to Project
You don’t need to do anything on this screen. Only click on Client ID like the given screenshot.
Step 10: Configure Consent Screen
Now, it’s time to name your project, to continue press Configure consent screen button from the right.

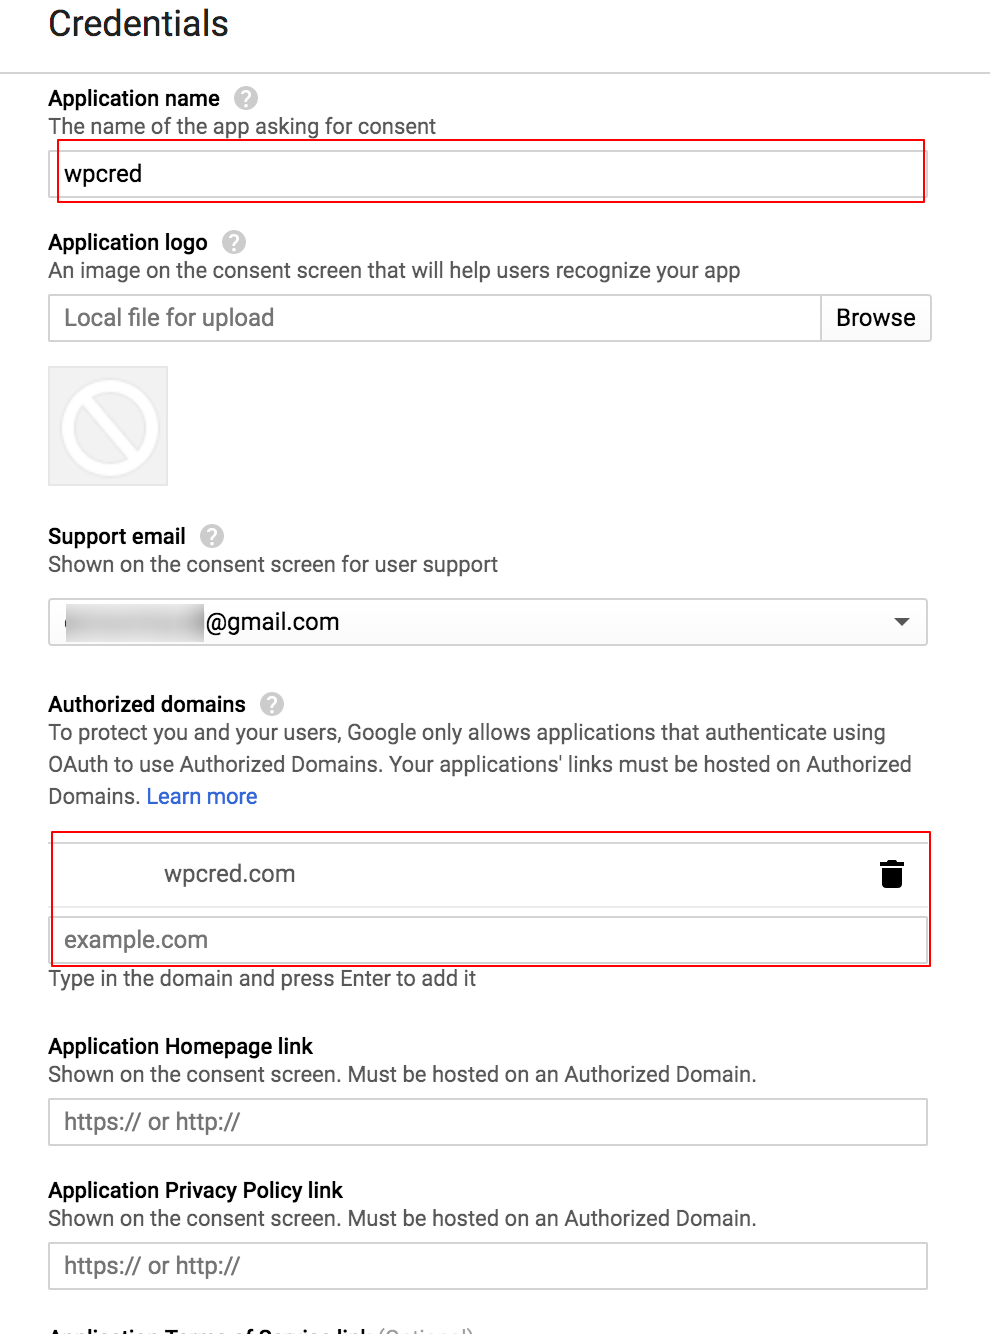
Step 11: OAuth Consent Screen
Enter the Email address, Application name, and authorized domain link. and then Save. Note down your Application name. We’ll use the same name in step 13
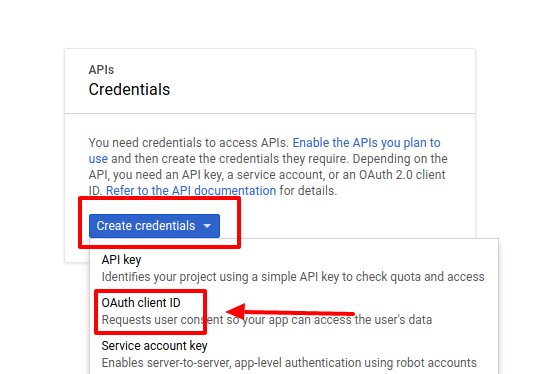
Step 12: Create API Credentials
From Create credentials drop-down, select OAuth client ID.
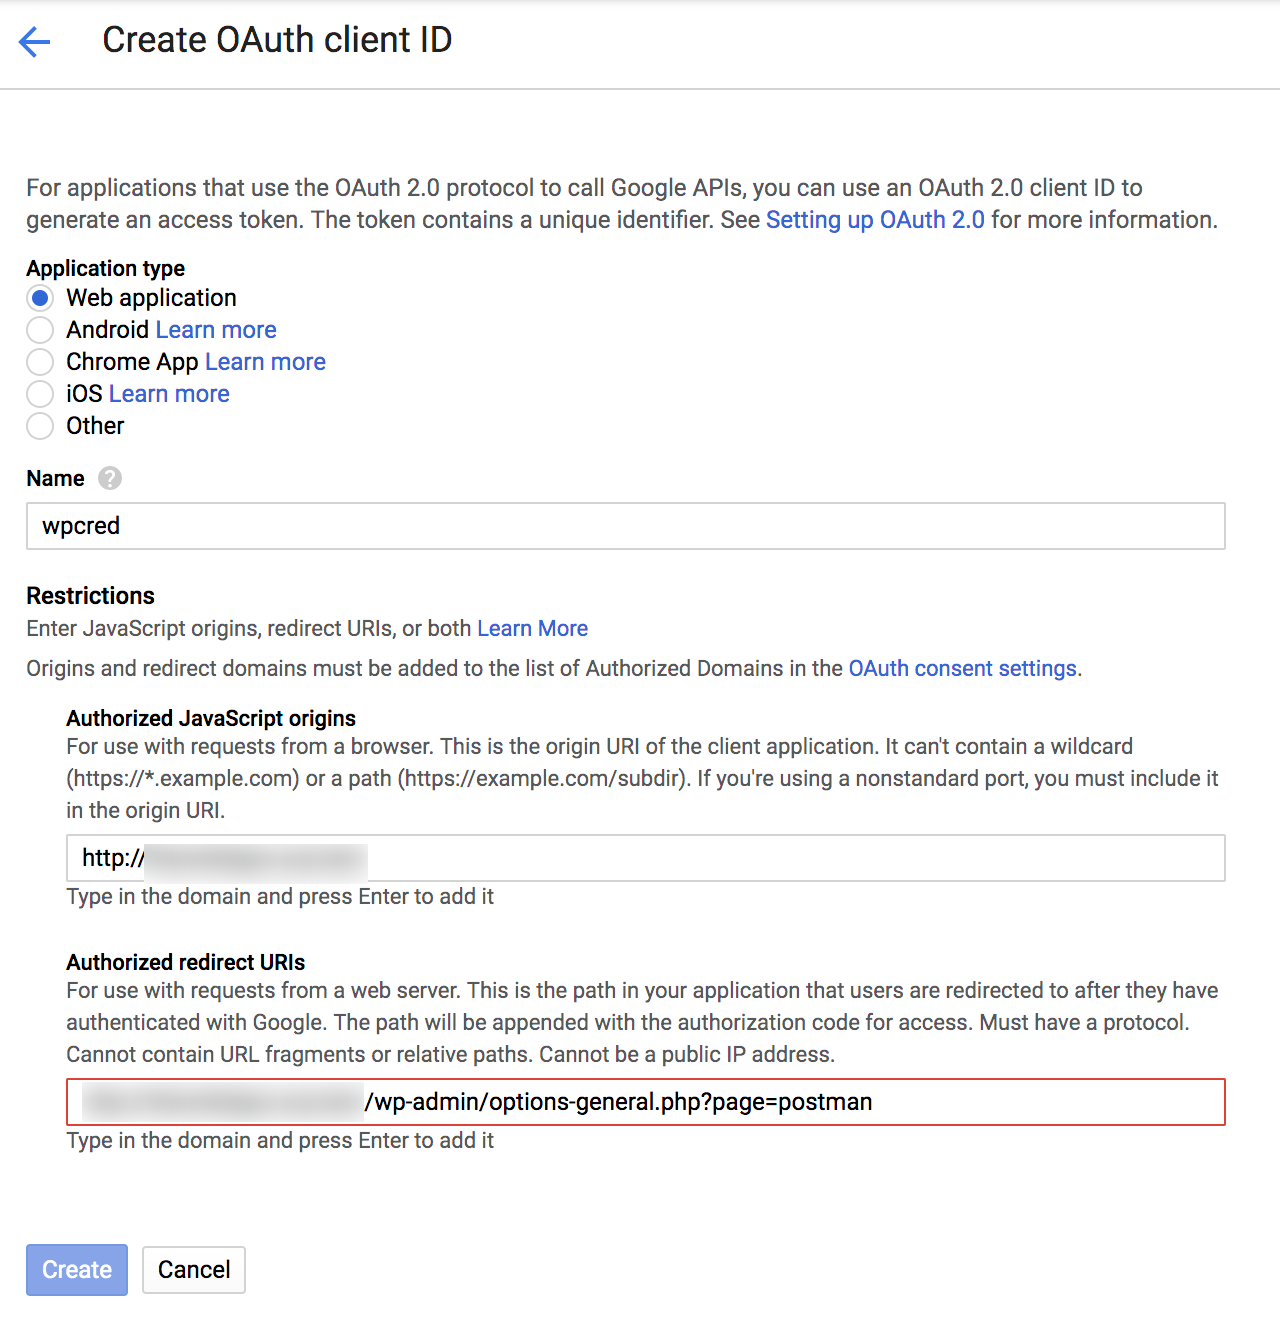
Step 13: Create Client ID
You may not get the previous step 13, you may directly land here after step 11. Select Web application, name your app the same you named in step 11.
Get back your Post SMTP Setup Wizard. Copy Authorized JavaScript origins and Authorized redirect URI details we saw in the step and paste them in the same field for Google Console API Project. Press Create to continue.
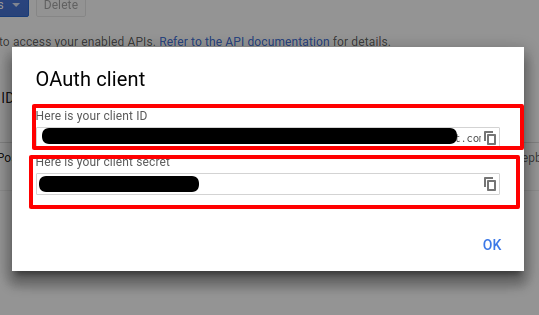
Step 14: Collect Client ID and Client Secret
Now, Client ID and Client Select appear. Copy these codes and paste them into the Post SMTP field we left blank in Step 6.
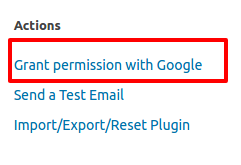
Step 15: Grant permission with Google
Now get back to Post SMTP settings, and select Grant permission with Google from the Actions setting.
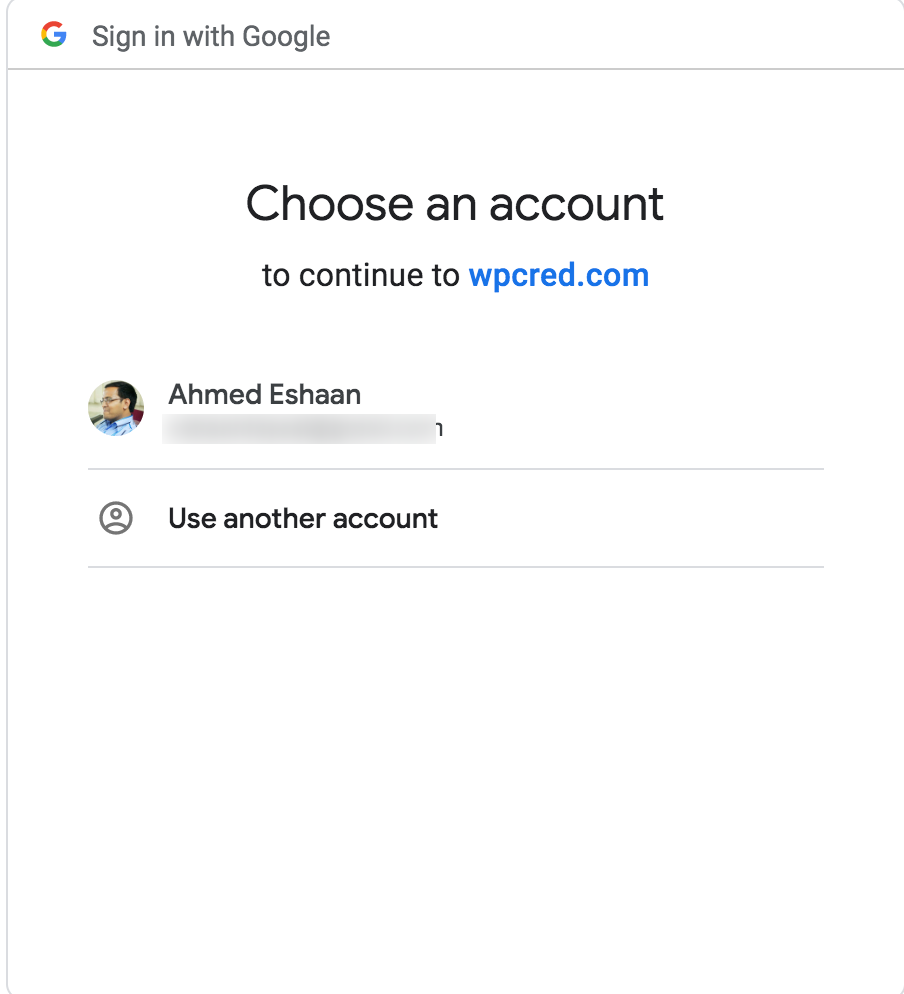
Step 16: Select Gmail Account
From the dialog box, select the Gmail account you want to use to send emails.
Step 17: Allow Permission For Post SMTP
Here your APP name would appear. It’s showing my app name in the dialog box. Approve the APP Name you used to send emails.

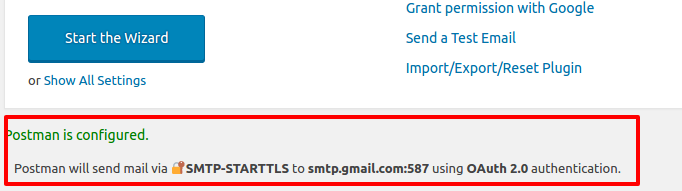
Step 18: Verify Post SMTP
To verify you configured everything correctly, just check that your status matches this one.
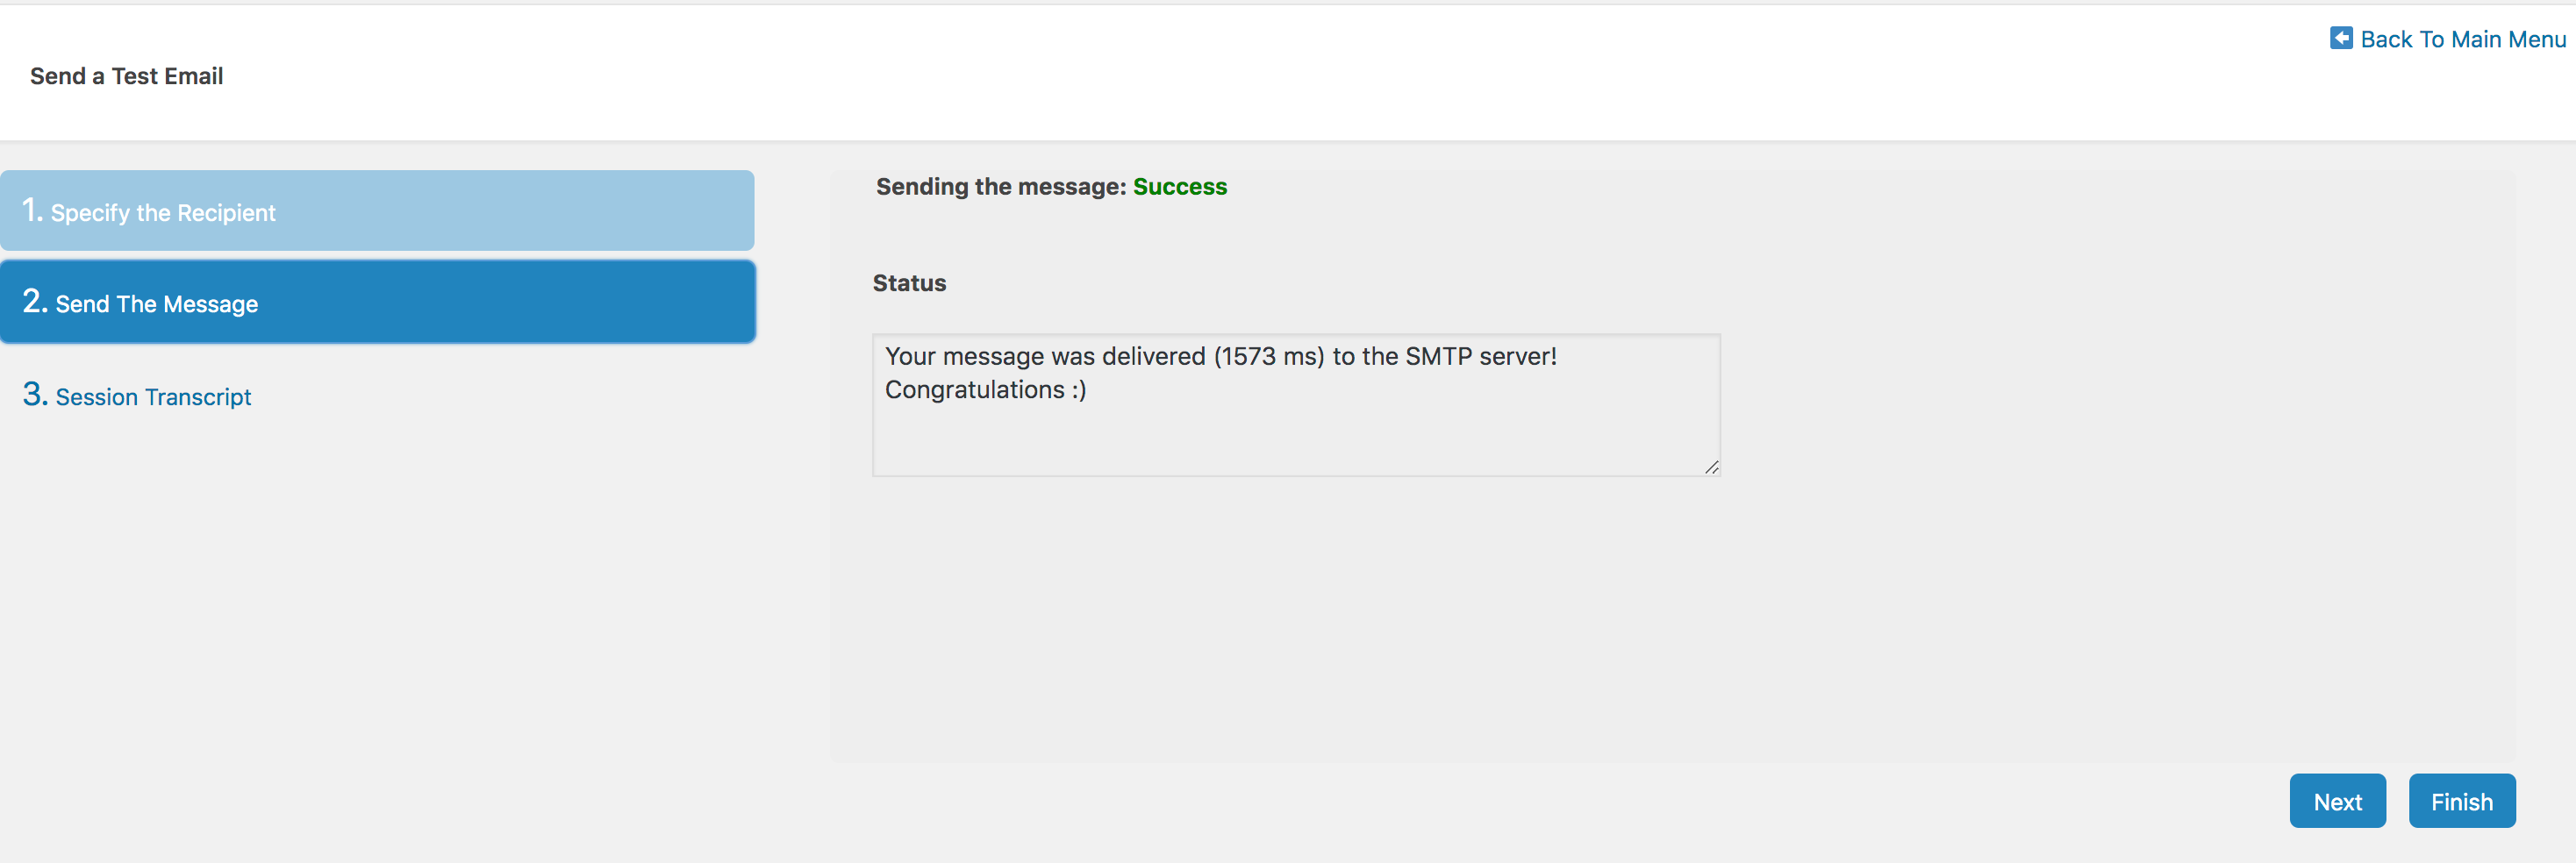
Step 19: Send a Test Email
In the final step, you can verify that everything is working as expected or not by using Send a Test Email option.

Step 22: Enter Destination Email
Check the following screenshot, it’s asking you to enter the destination email where you want to get a testing email.

if everything is configured properly, you should get a report like this one.
Conclusion
Hopefully, you have found this tutorial titled “How to set up WooCommerce SMTP server using Gmail API” helpful. If you face any issues while setting up your SMTP server, let us know in the comment section. We’ll try to help you out. In the meanwhile, If you see any HTTP errors then you can solve them by yourself easily.
Don’t hesitate to ask for more tutorials like this, just let us know the topic. We’ll try to write the next tutorial for you.