How to edit WooCommerce checkout page is very underrated, but it can have a great impact on your WooCommerce site. The checkout page is the most effective page for increasing the conversion rate. Because it is the gateway for a successful purchase. That’s why customizing a checkout page is more effective than customizing any other page.
In WooCommerce, there is a default checkout page, but it may not be a perfect one for your site. You need to customize it to create a perfect checkout page for your site. Don’t worry, it’s a very straightforward process, and we’ll show you the easiest way of doing it.
At first, focus on your visitors’ intent and understand how much information they’ll feel comfortable giving you, and how much is necessary. Then, arrange your checkout page according to that. Ask only for necessary and relevant information.
It’s necessary to customize the checkout page, because each business operates differently, and it’s important to create the checkout page according to their need. Customizing the checkout page may seem technical, but it’s not. Using a plugin, any non-technical person can do that.
There are many plugins using which you can customize your checkout page but we’re using Checkout Field Editor for its high popularity. You can follow this tutorial even if you’re using another plugin because the process is very similar to other plugins.
How to Edit WooCommerce Checkout Page
In this article, we’ll demonstrate
- How to customize the checkout page with an extra option
- How to add a WooCommerce order tracking form on the checkout page
How to Customize The Checkout Page with an Extra Option
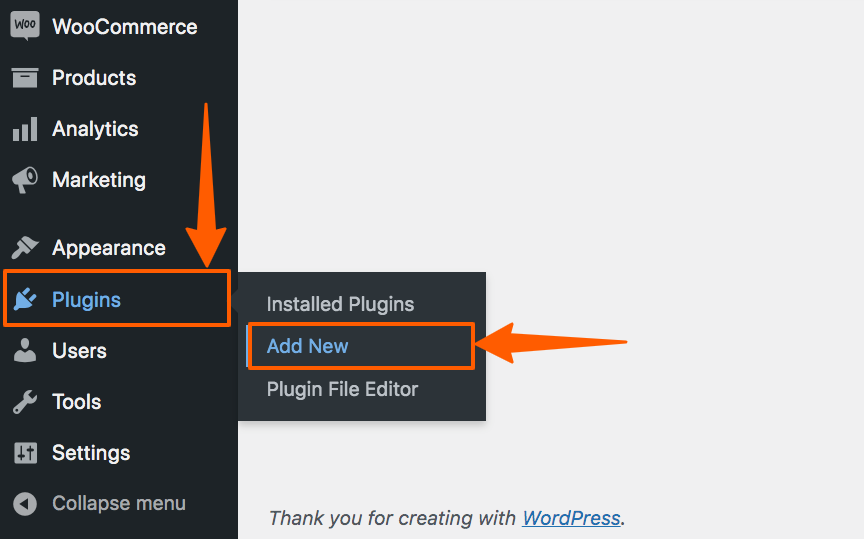
Step 1: Go to the WordPress dashboard, hover on the menu Plugins, then click on Add New.
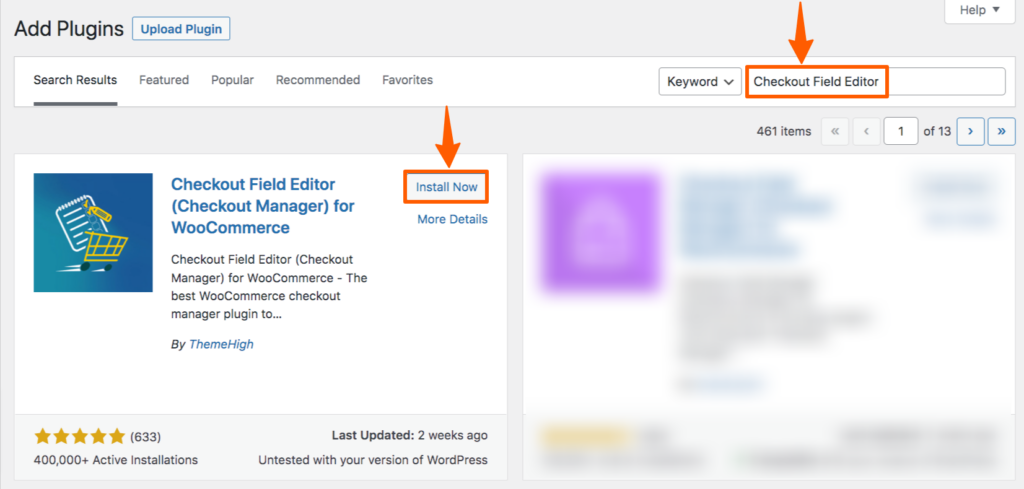
Step 2: You’ll find a Plugin directory, from there, search for Checkout Field Editor, then install and activate it.
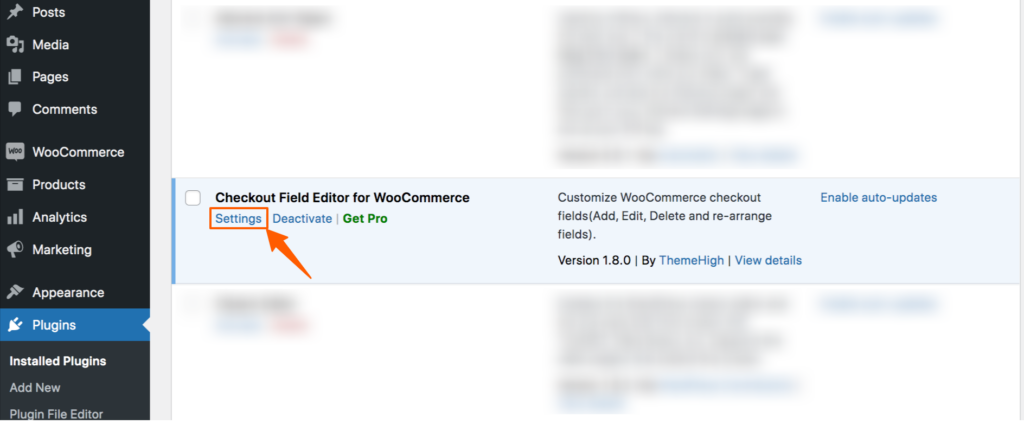
Step 3: After activation, go to the plugin list in case you’re not redirected. Then click on Settings.
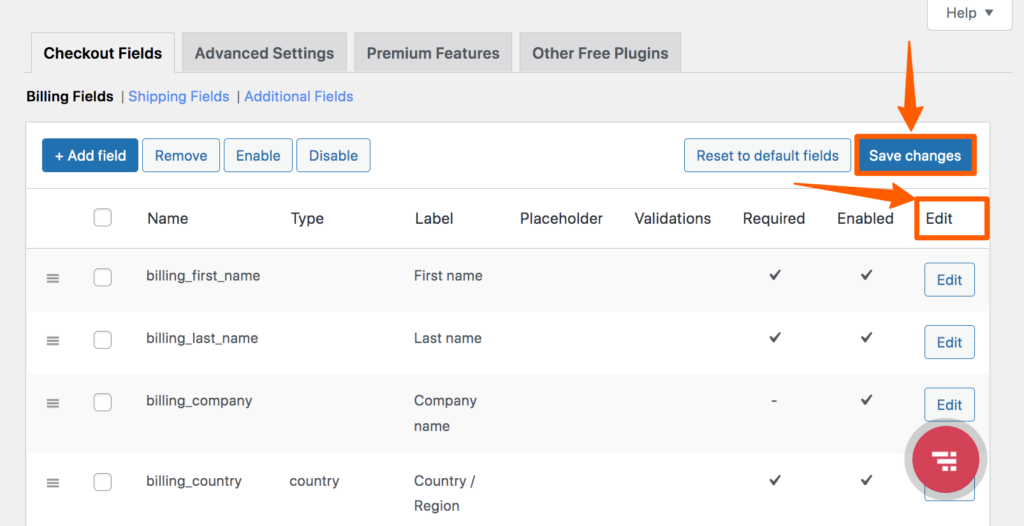
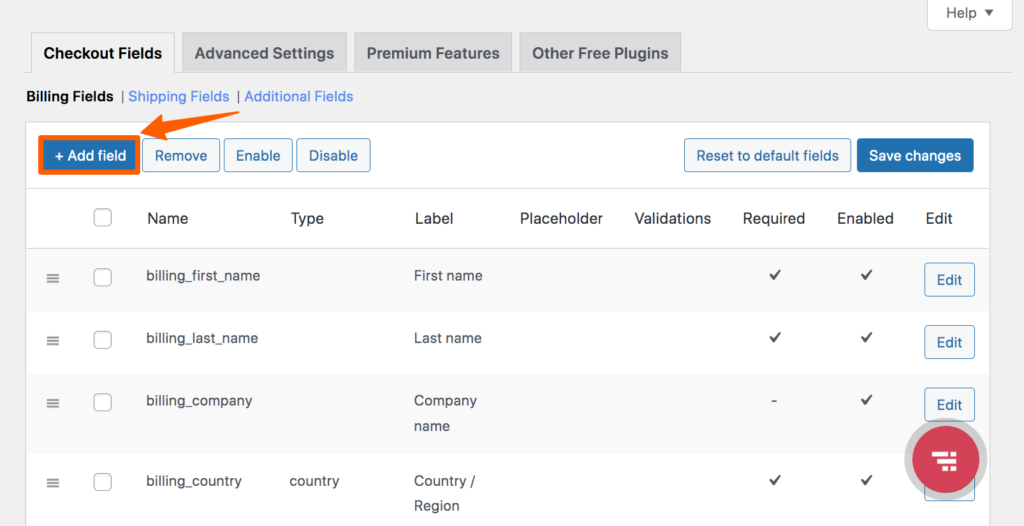
Step 4: You’ll find a page where you can edit all the existing pages. On this page, you can move the options according to your need. You can also add or delete options from here. After doing any type of customization, click Save Changes to save it.
Step 5: We’ll add a confirmation section to the checkout page for demonstration purposes. To do that, go to the setting page of the Checkout Feild Editor, then click “+Add field”.
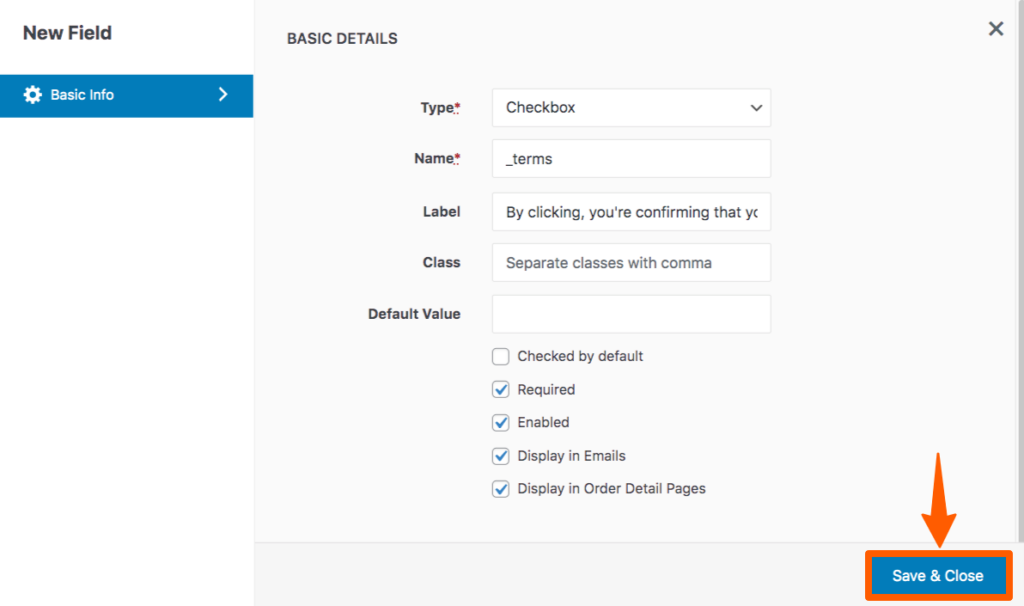
Step 6: Then a pop-up will appear. In that section, you can choose the type, name, label, class, and default value. You can also control the field’s requirement status, being enabled or disabled, etc.
For demonstration purposes, we’re adding a checkbox field that ensures that the customers are agreed to the terms and conditions. And we’re making it required for completing the order. You need to fill out this form according to your need.
After filing those fields, click Save & Close to make it effective.
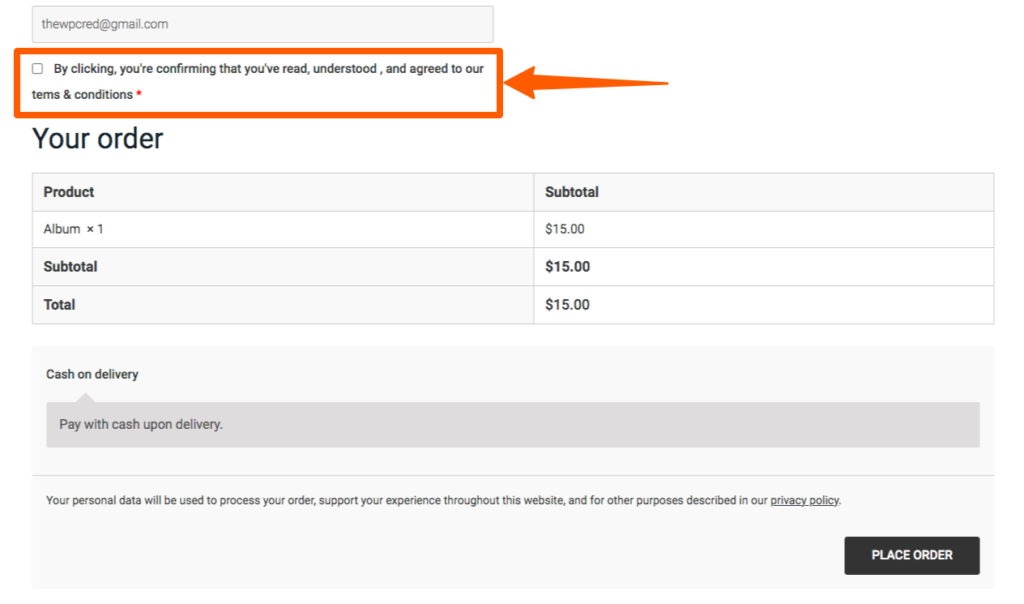
Preview
Now, the final output will look like this.
How to Add WooCommerce Order Tracking Form in WordPress
Adding an order tracking form is a customization of the checkout page that is easier to do without using any plugin. It only requires pasting a shortcode to the checkout page. In case you don’t know what a shortcode is– it’s a line of code that executes the function that is set to it.
You can use default WooCommerce shortcodes or create a custom shortcode as your need.
For adding an order tracking form, WooCommerce has its own shortcode. We can use it on your website for easy integration of it. Let’s go through the 3-step process.
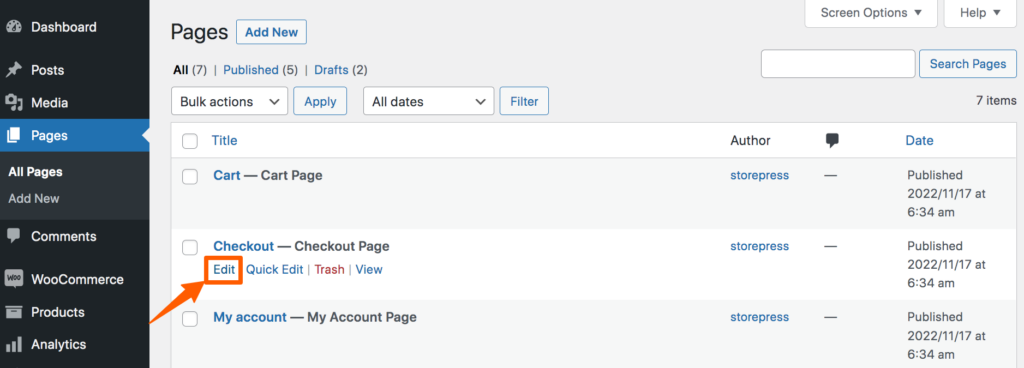
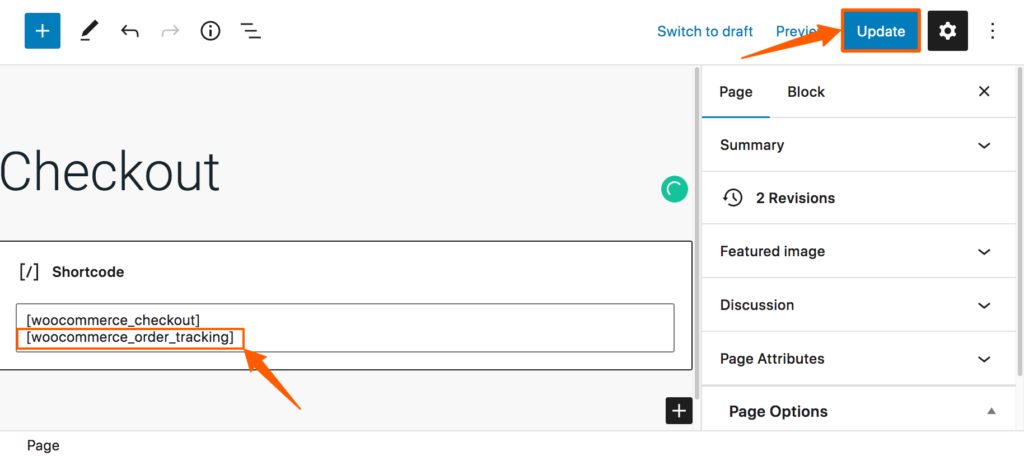
Step 1: Go to the WordPress Dashboard, hover on Pages, then click All Pages.

Step 2: Hover on the page you want to edit, then click Edit.
Step 3: Now put the shortcode there, and click on Update.
[woocommerce_order_tracking]
Preview
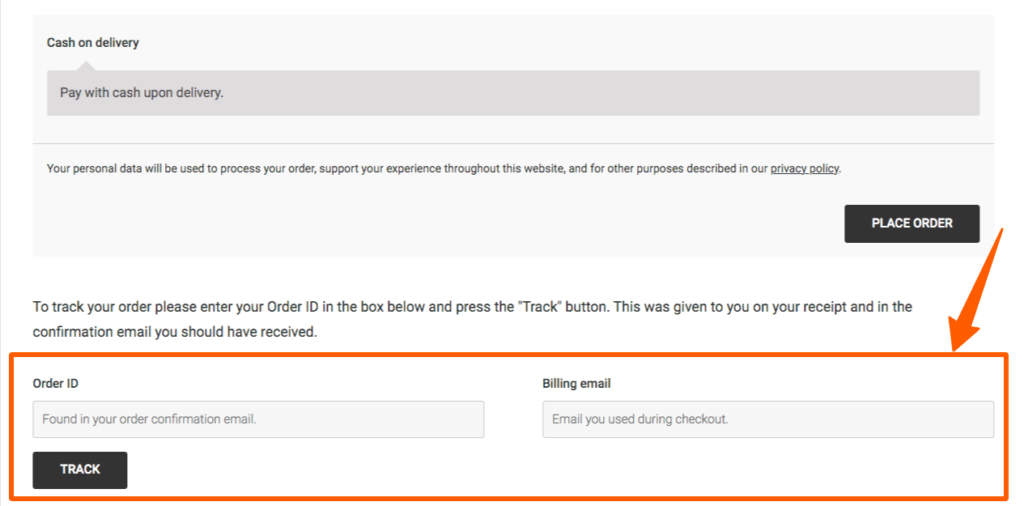
Now, you’ll find a section on your checkout page where customers can track their products.
Conclusion
We hope you’ve learned how to edit WooCommerce Checkout Page. In case you’re facing any issues regarding this, feel free to drop a comment, and we’ll try to solve it as soon as possible.